-
Metamorphosis complete: develmonk.com is now UnixGreybeard.org

Same great articles, new curmudgeonly attitude (We’ve finally reached the stage of “Get off my lawn”, which in this context is “get off my old domain”. please&thank you!) When I started blogging about tech over 10 years ago, it was originally meant to be a place to keep instructions so I wouldn’t forget how to…
-
Benefactors, Meet Cartography: Using Public Disclosure Data for a Geospatial Graph with Python, Pandas, GeoPandas and Matplotlib

I was looking at datasets on data.wa.gov to see what might be fun for a project, and I came across public info disclosing the amount paid to employ WA state lobbyists. It’s a very localized representation of interests attempting to influence politics and policy for our residents and lawmakers, as it represents money spent only…
-
Connecting to an old Unifi AP via SSH
Also called, “what to do when encountering the following Error: No matching host key type found. Their offer: ssh-rsa,ssh-dss” ?? I’ve got a super old UAP-LR I still manage with an old version of the Unifi Controller locally, since I barely use WIFI for anything and I am just not interested in upgrading. However, every…
-
Old Tech, New Tricks
Well, not _that_ new, but still … different, and decidedly unconventional… I keep telling myself I’ve gotta write about the Hikvision setup I put together at my friend’s fast food restaurant/mini dinosaur theme park, because it’s so unusual, I doubt many people have done it before. I didn’t “put it together” originally, per se, he…
-
`nerdctl`: NTT’s Gift to Humanity?

I’ve been keeping an eye on nerdctl. While it’s still a little trickier than Docker or Podman for commands to work consistently, there’s fascinating innovation happening under its hood. One such innovation is Bypass4NetNS, the new virtual network framework used by rootless containers that’s *faster* than root kernel networking. Yes, you read that right. And…
-
Using VDO on Ubuntu

Unfortunately, this hasn’t gotten as much attention as I think it should, but vdo volumes are now officially supported as in-tree modules in kernel 6.9 and newer. If you don’t know what vdo volumes are yet, check this out (they’re really cool). In my opinion, vdo is the best alternative to zfs‘s compression and deduplication…
-
Finally, Decent Output From `Flatpak search -v` (updated to include `snap search` and conditionals)
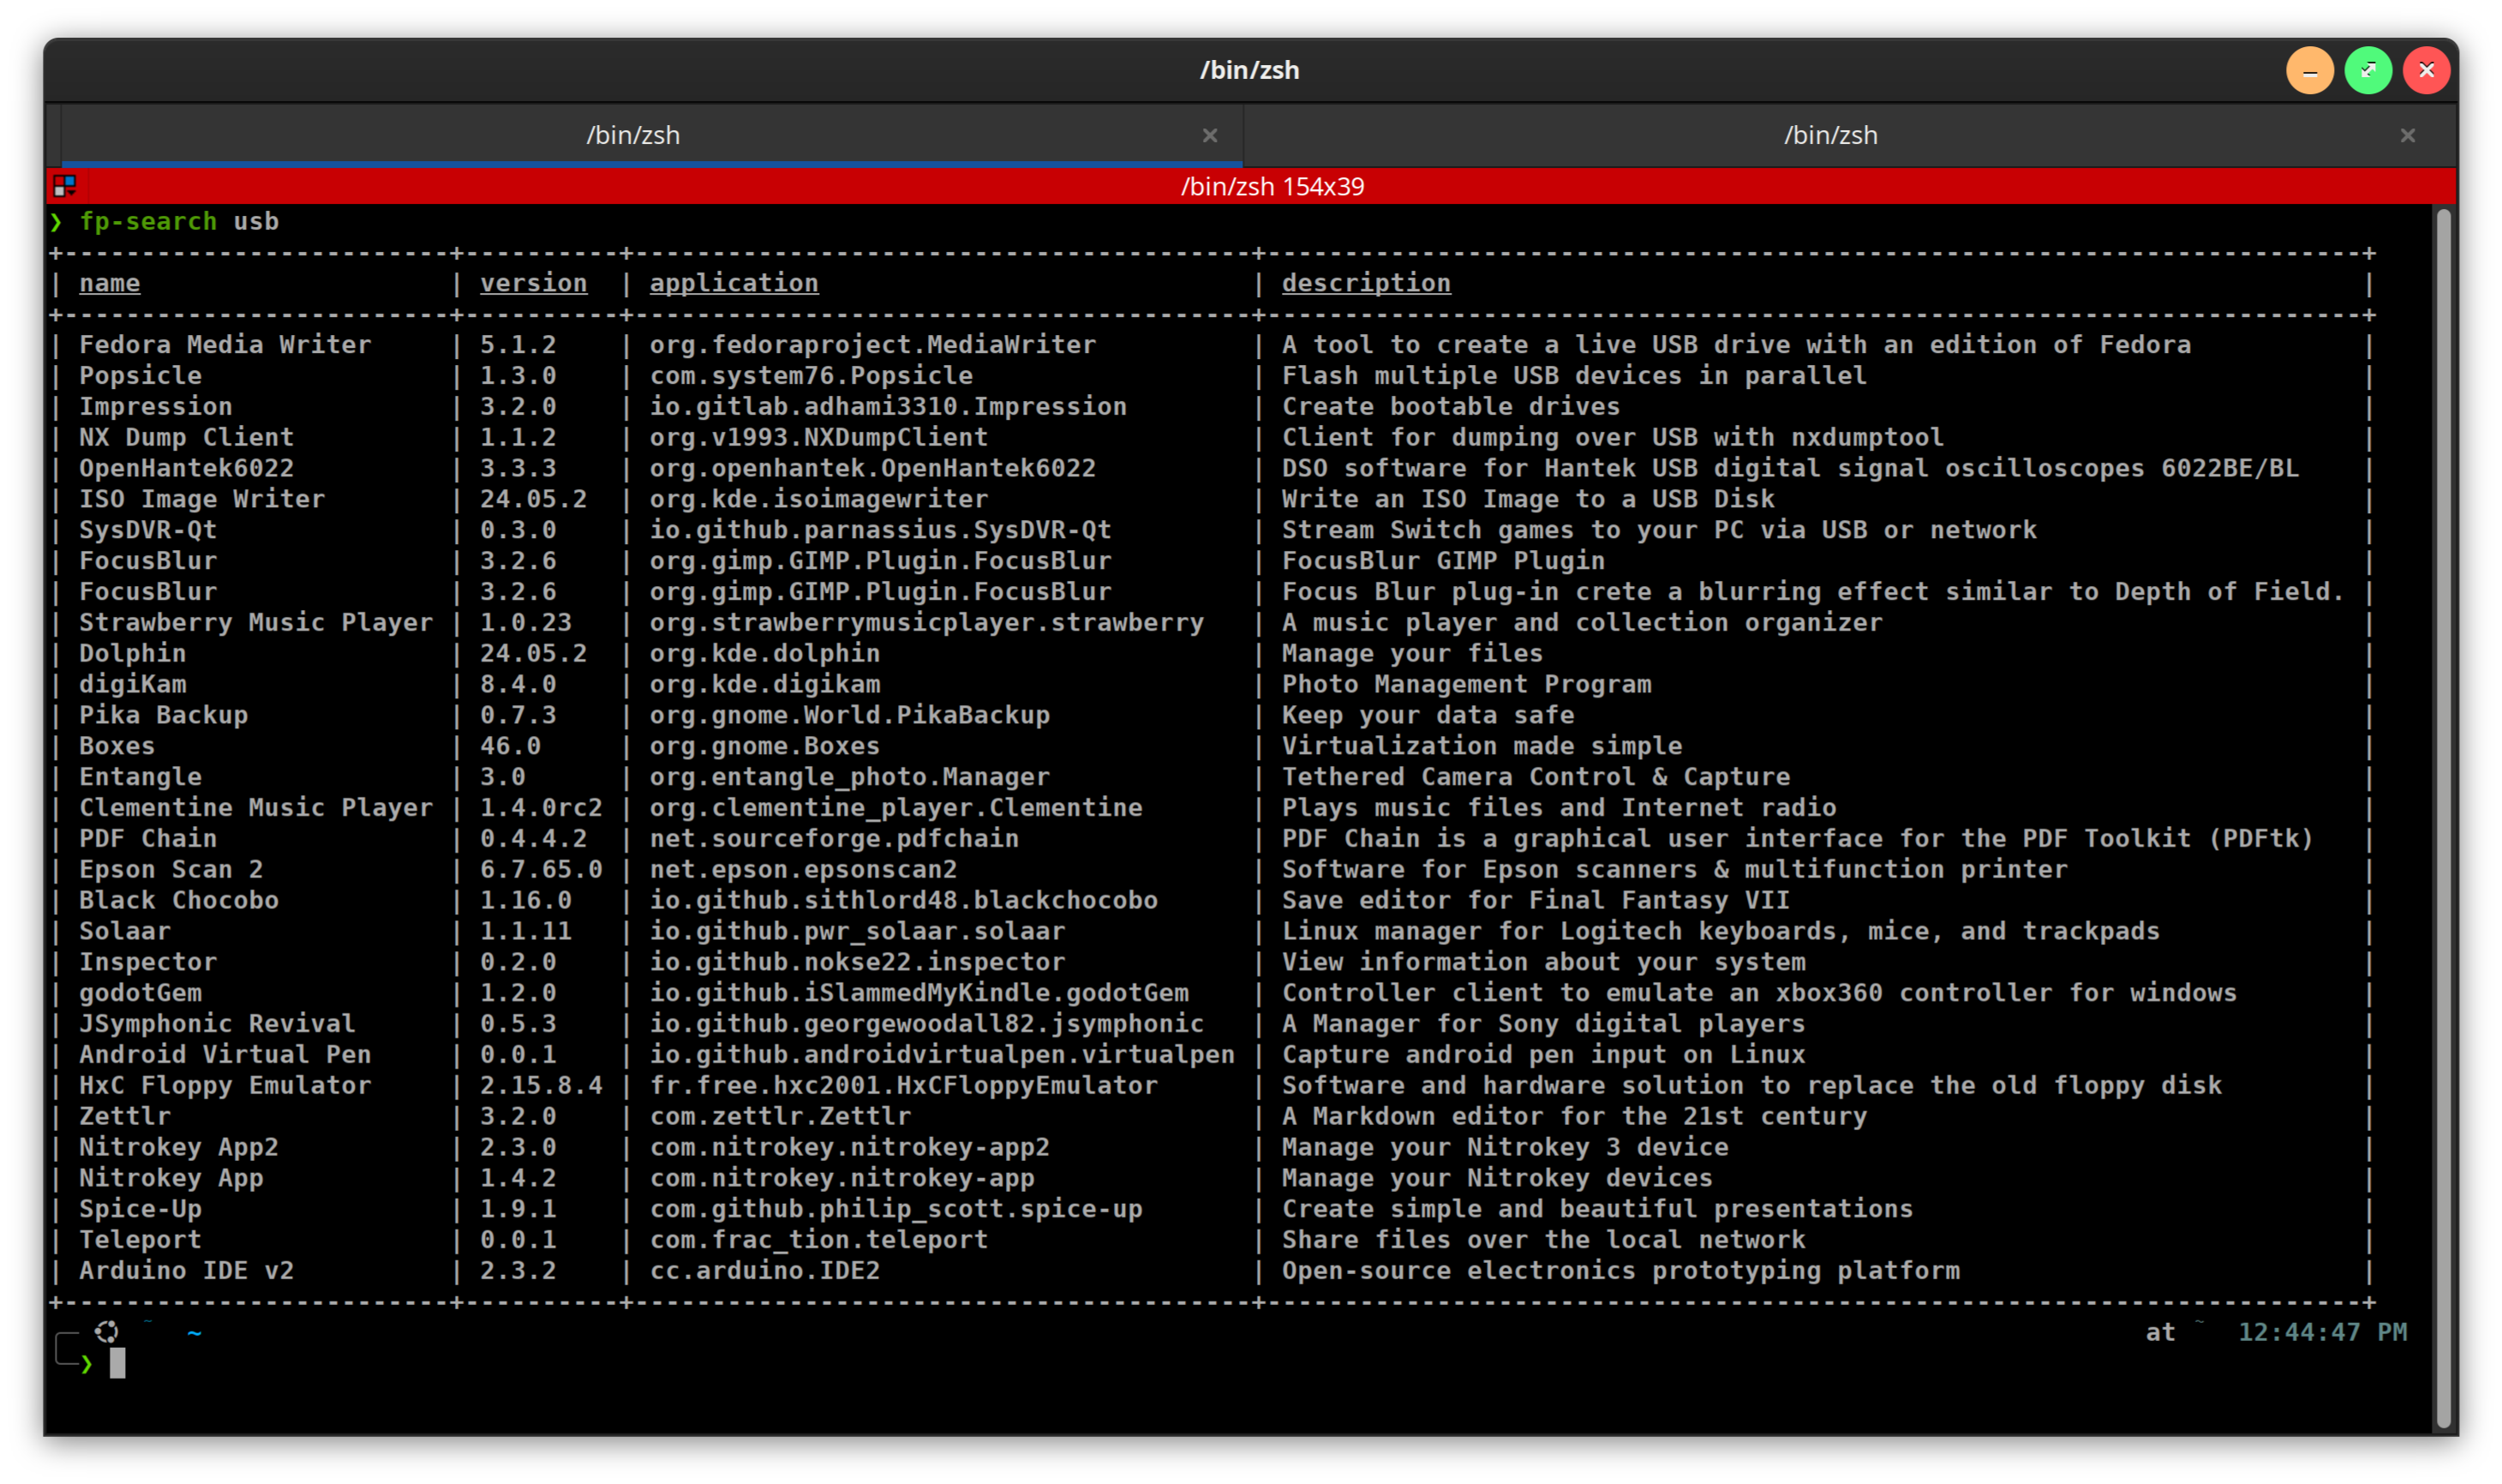
flatpak search doesn’t really work, my terminal is always too narrow for the output not to truncate the name of the app, when I need the full thing in order to install it. But flatpak search -v is generally unreadable, as the descriptions are invariably longer than my terminal width, so the output ends up…
-
The Power of `pv /dev/$DISK_DEVICE | zstd -0f > image.zst`

I’ve been making these images of my hard drives using fsarchiver for about 6 months, and one of the most amazing things I’ve discovered through all of it is how tiny .raw.zst images get when you run them through a compression library, whether it’s compressing them or not. Case in point: I way oversized my…
-
`quickemu` PPA Available on Launchpad
I’ve been aware of quickemu for 4-5 years now, and just went out looking for it again since I thought it’d be helpful for a project on endpoint management with Microsoft Intune. I’d like to see if I can’t set up a few devices running Windows, Mac OS, Ubunu and Redhat, remotely manage some dependencies…
-
Suppress Irritating Warning Messages From `apt`

You know the error messages you get any time you’re trying to pipe the output of apt to something? They’re kind of irritating since they don’t help in any meaningful way. e.g. you might want to reduce apt search results to packages that contain a string either in the name or description, but the error…
-
The Miracle of `debootstrap` & Installing Ubuntu to Thin-LVM in a Very *Archlinux-Like Way

Ubuntu debootstrap for IoT maas router (Internet Gateway/firewall) – a 2-part post. Part 1: Installing Ubuntu to Thin-lvm in a Very Arch-Like Way A quick mention: I just copied this out of my plain text notes I do while completing these things. I think it’s fairly error-free, but I’ll come back and flesh it out…