
I love Proxmox, but I’ve always preferred to have a more modular style. There’s a lot to be said about ‘batteries included’ hypervisors with all the bells and whistles all set up for you automatically. But what if you want to use other elements of another hypervisor with them not meant for them specifically?
Often modular solutions (aka the greater Linux FOSS ecosystem) are more compatible with other modular solutions than with a 1-size solution OS made by a single vendor. Just like vendors don’t tend to collaborate on Rancher, OpenShift, or Azure, the same goes for Proxmox – but they all contribute to the FOSS solutions upstream. And maybe you want a little more control, a little more ‘vanilla’ upstream positioning, or just prefer the way you’ve been doing things and don’t feel like changing (hand raised), all the solutions and workflows touted by vendors are all re-createable with upstream technologies.
One I’ve thought was really clever is the way Proxmox’s default LVM storage configuration with thin provisioning makes a separate logical volume for each new VM it creates, because then you can make them all RAW images and not have to worry about thick space allocation.
If you have no idea what I’m talking about, imagine this contrived visual analogy: You want to drive a fleet of Ferraris, but you only have room in your garage for a couple Yugos. If you could have a bunch of Ferraris overlap since you only drive them by yourself (imagine they’re new 1-seaters models that could take a 2nd person if you REALLY had to, but, come on, this is ‘merica), and they were still stupid fast, you’d do that, right?
That’s basically what the Proxmox default storage setup seems like to me: All of the great performance aspects of giant, overpowered sports cars the size of lemon-mobiles, the size of which can be fit 4-fold greater in the belly of your McMansion in the ‘burbs.
OK, enough ‘burb chatter, let’s get into the recipe. This is going to be a quick and dirty demo, but it’s basically two posts in one:
- Physical to Virtual Machine Conversion (making a ‘real’ PC into a VM)
- Setting up a storage solution that emulates Proxmox’s default thin-LVM layout
First, make sure you have a decent QEMU front-end installed. This guide is distro-agnostic, but setting up your front-end is beyond the scope of this article, so I’ll leave that for you to sort out if you need to before you come back.
Note: While you could probably figure out how to adapt this to ‘bare’ QEMU, QuickEMU, or Gnome Boxes, I recommend the libvirtd framework, namely Virsh (CLI) or Virt-Manager (GUI). I’ll be demonstrating the VM portions using Virt-Manager.
Part One:
The Proxmox-Style one LV per VM Storage Configuration
We’ll need:
- Either an entire physical disk or a clean partition for our physical volume.
If you need, you can use a separate partition on a drive with pre-existing partitions for your physical volume, but it needs to be wiped clean first.
For example:/dev/nvme2n1p3(you can runwipefs -aon this, but NOTsgdisk -Z) - A volume group
- A thin pool, and
- A new logical volume for each VM
- An
fstrimtimer set
LVM Steps 1 + 2:
Start with prepping the physical volume and volume group. I’ll be using an entire 2TB Samsung pm93a m.2 NVMe as my physical volume, shown here as device /dev/nvme2n1. Your device path will likely be different, use lsblk to ID:
# Prepping your physical volume
# Make sure you're working on the right drive!
root@nocow:/# lsblk

# THE FOLLOWING COMMANDS WILL WIPE YOUR DRIVE
# Don't make a mistake identifying your drive, and
# don't use your OS drive!
root@nocow:/# wipefs -a /dev/nvme2n1

# Skip the following command if you're using a
# partition instead of a whole drive!
root@nocow:/# sgdisk -Z /dev/nvme2n1

# Now that you have a bare partition or volume,
# assign a disk to be used by LVM
root@nocow:/# pvcreate /dev/nvme2n1

# Create a new volume group for the thin pool
root@nocow:/# vgcreate vms /dev/nvme2n1
LVM Step 3:
Now that we have the physical volume and volume group prepped, we can create a thin pool for containing the VMs.
You have two options:
- You can constrain the pool to an arbitrary size (can be extent or logical) – this is safer, so I’ll start with that (you can always change it later – even while VMs are running!)
- OR, you can have the thin pool grow to the size (extents) of the containing volume group automatically
Option 1: Use a pre-determined size for your thin pool.
This one might not use the entire VG, but you can get it as close as possible if you want. And remember, you can overcommit the logical volumes (for each VM) so it doesn’t really matter that much (within reason).
# The safer option: use part of VG, since I want the option
# to create another pool outside this one on the same VG
root@nocow:/# lvcreate -L 1400G -Zn -c 128 -T vms/pool
note: -Zn is no auto-discard and -c 128 is 128K cluster size
Option 2: Configure the thin pool grow to the entire size of the VG.
This is nice because you know the pool will automatically take up the entire drive space. The caveat is if you add another drive to the VG with the thin pool configured this way, it’ll automatically expand to take up both the drives.
Be careful if you do this, because thin pools cannot be reduced in size!
# Take up the entire VG automatically using this command:
root@nocow:/# lvcreate -l 100%FREE -Zn -c 128 -T vms/pool

# Also, notice the -Zn flag - this is to prevent auto-discard, which
# can pummel your FS IOPS, but you'll need to set an fstrim timer
# to prevent the discarded blocks from eventually taking up the
# entire space of the pool
root@nocow:/# systemctl enable --now fstrim.timer
Either one of these will produce a pool configured something like this (option 1 shown):
root@nocow:/# lvdisplay vms/pool
  --- Logical volume ---
  LV Name                pool
  VG Name                vms
  LV UUID                rSDH42-DauO-K0pS-vksI-GZhp-L5ay-7jZ90T
  LV Write Access        read/write (activated read only)
  LV Creation host, time WantonWildebeest, 2024-07-14 00:46:33 -0700
  LV Pool metadata       pool_tmeta
  LV Pool data           pool_tdata
  LV Status              available
  # open                 0
  LV Size                <1.37 TiB
  Allocated pool data    71.99%
  Allocated metadata     22.11%
  Current LE             358400
  Segments               1
  Allocation             inherit
  Read ahead sectors     auto
  - currently set to     512
  Block device           252:3
pool will be read-only. Logical volumes contained within are RW
LAST STEP – REALLY IMPORTANT
Notice the -Zn flag – this is to prevent the pool from doing automatic discards, which can pummel your IOPS, but you’ll need to set an fstrim timer to prevent the discarded blocks from eventually taking up the entire space of the pool
I recommend editing the fstrim.timer settings in order to run it every day. Here’s a quick script you can copy/paste to make the edits easy (must run as root – e.g. sudo su):
systemctl disable --now fstrim.timer
mkdir -p /etc/systemd/system/fstrim.timer.d
printf '[Unit]
Description=Discard unused filesystem blocks once a day
\n[Timer]\nOnCalendar=daily\nRandomizeDelaySec=60sec
Restart=on-failure\n' \
        > /etc/systemd/system/fstrim.timer.d/override.conf
# verifying override.conf
cat /etc/systemd/system/fstrim.timer.d/override.conf
Reload the unit files, start the timer, and make sure it’s running:
systemctl daemon-reload
systemctl enable --now fstrim.timer
systemctl status fstrim.timer
Don’t forget to exit root when you’re done.
If you’d rather edit the unit by hand yourself, you can run systemctl edit fstrim.timer:
### Editing /etc/systemd/system/fstrim.timer.d/override.conf
### Anything between here and the comment below will become the contents of the drop-in file

[Unit]
Description=Discard unused filesystem blocks once a day

[Timer]
OnCalendar=daily
RandomizeDelaySec=60sec
Restart=on-failure

### Edits below this comment will be discarded


### /usr/lib/systemd/system/fstrim.timer
# [Unit]
# Description=Discard unused filesystem blocks once a week
# Documentation=man:fstrim
# ConditionVirtualization=!container
# ConditionPathExists=!/etc/initrd-release
#
# [Timer]
# OnCalendar=weekly
# AccuracySec=1h
# Persistent=true
# RandomizedDelaySec=100min
#
# [Install]
# WantedBy=timers.target# MAKE SURE YOU SET THIS OR DEAL WITH DISCARDS ANOTHER WAY!
root@nocow:/# systemctl enable --now fstrim.timerPart Two:
Migrating Physical Computers to Virtual Machines
OK, now that we have our thin-pool we’ll be working from, say we have an old drive from a laptop we need to rescue. Take it out of the laptop and attach it using an interface (shown here: USB 3.0 to SATA)
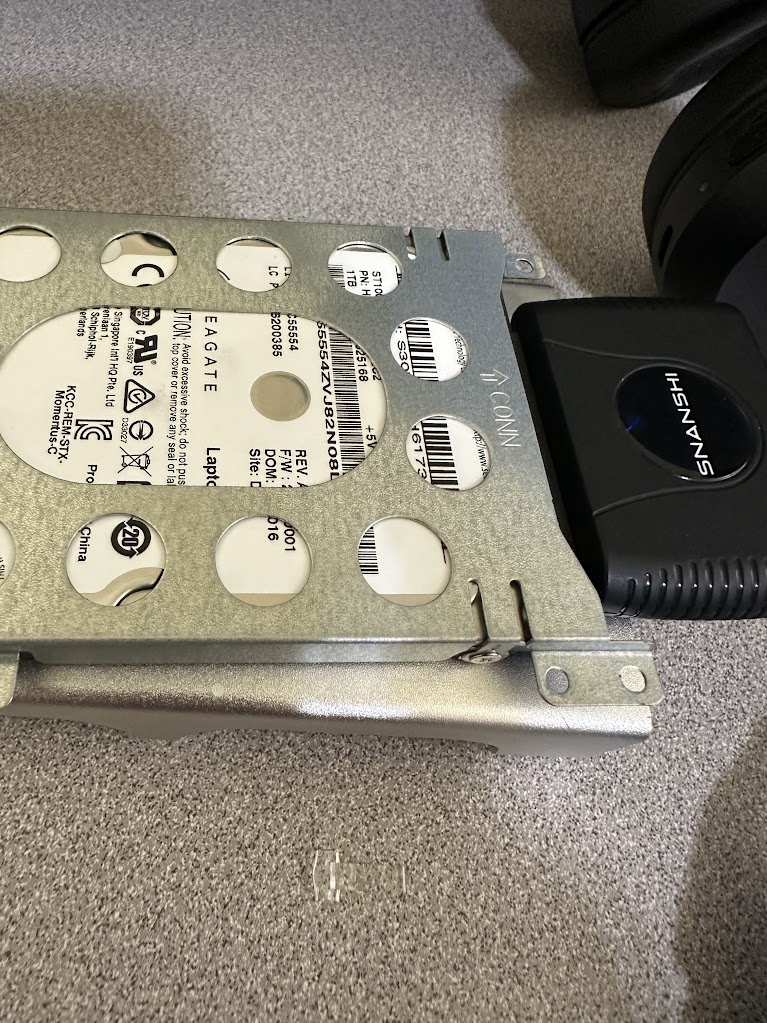
Create a logical volume in your thin pool the same size or slightly larger than the drive – here, we’ll be rescuing this sad, old a 1TB spindle disk:
root@wantonwildebeest:/# vgcreate -V 1T -T vms/lynettejeffs Then clone the drive to the new LV using your favorite cat, dd, etc. (here, I’ll be using pv because … progress bars…)
# gotta love progress bars...
root@wantonwildebeest:/home/avery/vms# pv /dev/sdb > /dev/vms/lynettejeffs
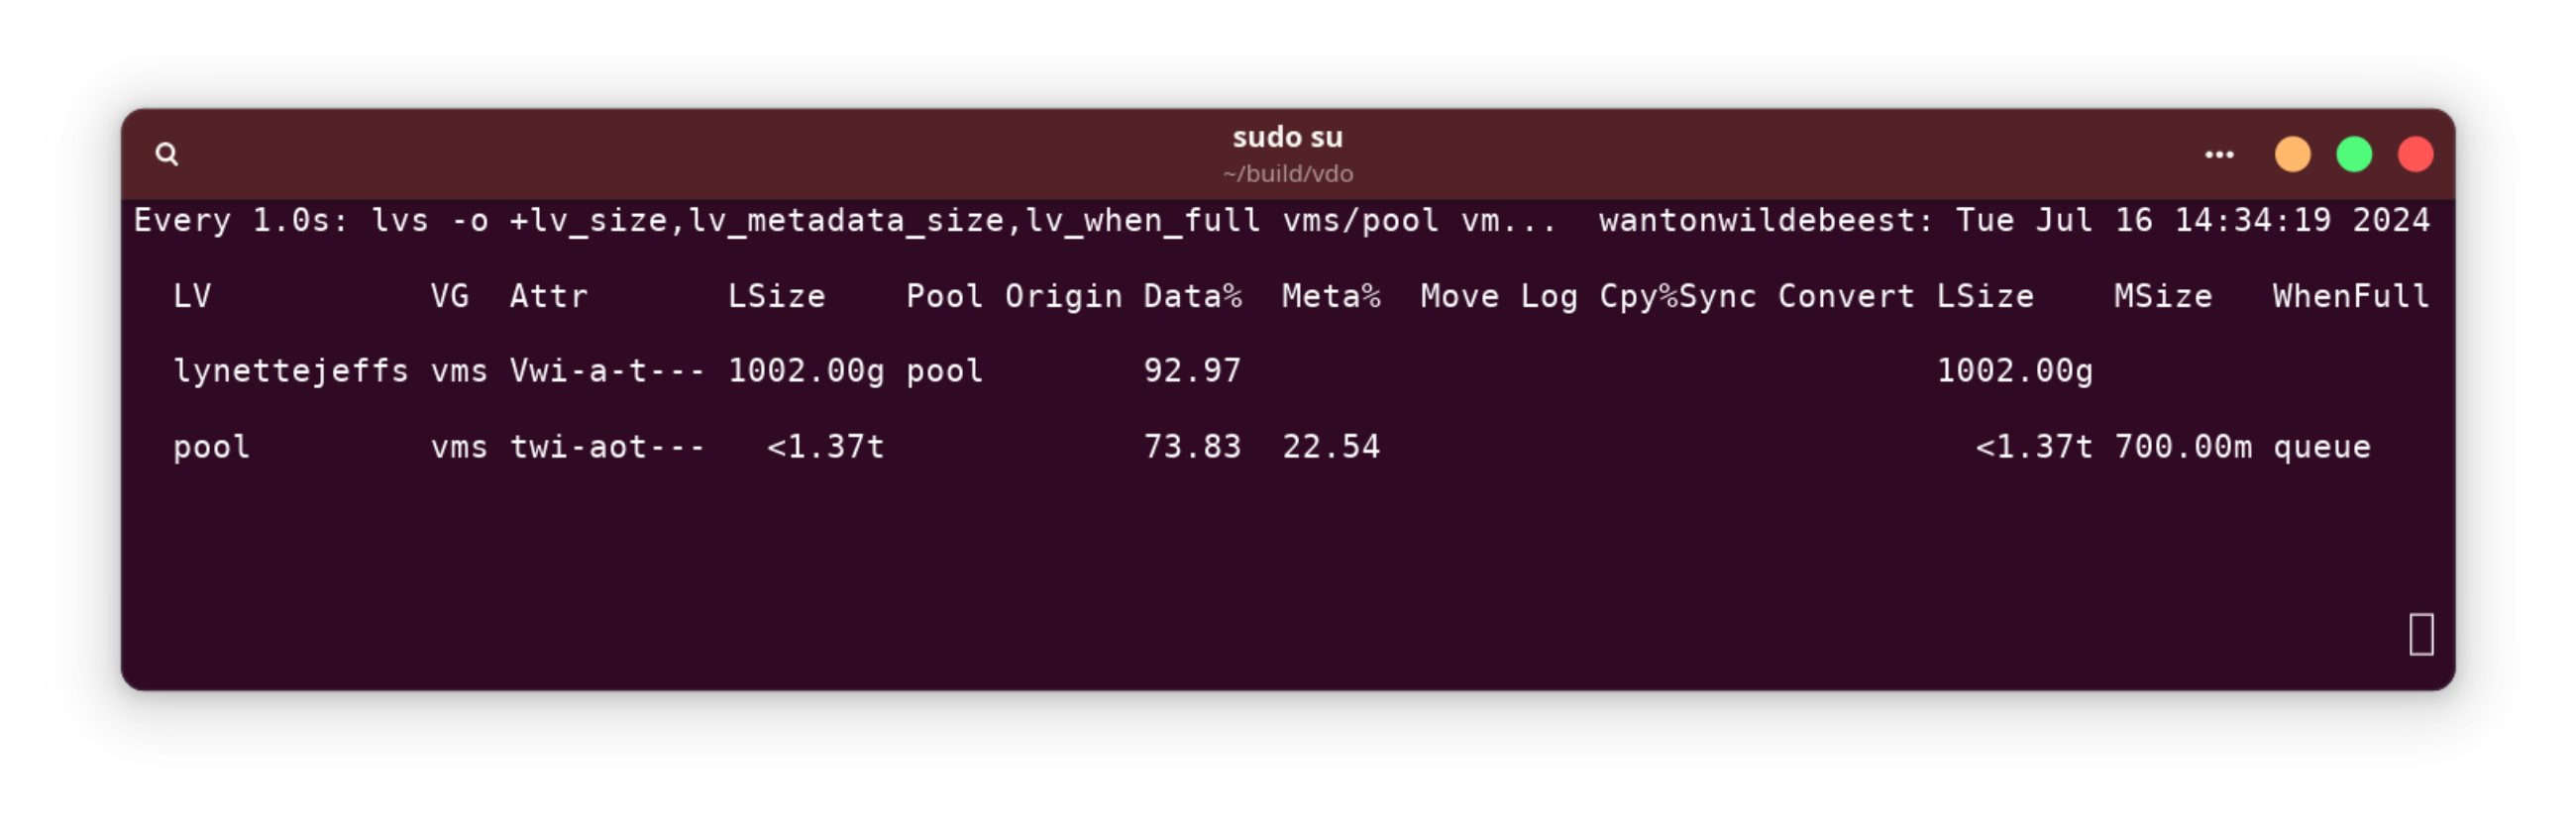
931GiB 3:09:34 [83.9MiB/s] [==================================================================>] 100% Pro tip (optional): If you’re like me, you might be on pins-and-needles about your pool filling up while you’re cloning the drive. You can set up a watch job for the actual data + metadata amount while it’s working.
Remember, although you can virtually over-commit thin volumes, you can’t fill your drive with more data than it holds physically! If it’s dangerously close, abort the clone. If it’s going to go over, or has gone over, delete the clone immediately and think of a new strategy before your entire thin pool becomes inoperable:
root@wantonwildebeest:/home/avery/vms# watch -n 1 'lvs -o +lv_size,lv_metadata_size,lv_when_full vms/pool vms/lynettejeffs'That looks like this:
Pro tip: If you need separate partitions from a multi-partition disk image, you can use partx or kpartx (the syntax is the same) to probe the image and map the partitions in /dev/mapper:
root@nocow# kpartx -a -v /dev/vms/lynettejeffs
add map vms-lynettejeffs1 (252:14): 0 532480 linear 252:13 2048
add map vms-lynettejeffs2 (252:15): 0 32768 linear 252:13 534528
add map vms-lynettejeffs3 (252:16): 0 969988096 linear 252:13 567296
root@nocow# ls -1 /dev/mapper
control
fedora_fuzzlenobbin-home
fedora_fuzzlenobbin-pool00
fedora_fuzzlenobbin-pool00_tdata
fedora_fuzzlenobbin-pool00_tmeta
fedora_fuzzlenobbin-pool00-tpool
fedora_fuzzlenobbin-root
vms-build
vms-coreos
vms-lxd
# original:
vms-lynettejeffs
# new separate partitions:
vms-lynettejeffs1
vms-lynettejeffs2
vms-lynettejeffs3
vms-pool
vms-pool_tdata
vms-pool_tmeta
vms-pool-tpool
(and from there mount them in your filesystem if you to back something up, etc.)
root@nocow:/# mount /dev/mapper/vms-lynettejeffs3 mnt
root@nocow:/# ls /mnt
'$GetCurrent'	 bootTel.dat		   OneDriveTemp		  Recovery		       WLAN_1_Driver.log
'$RECYCLE.BIN'	 Config.Msi		   pagefile.sys		  swapfile.sys		       WLAN_2_WiFi.log
'$SysReset'	'Documents and Settings'   PerfLogs		 'System Volume Information'   WLAN.log
'$WinREAgent'	 DumpStack.log.tmp	   ProgramData		  UserGuidePDF
 Boot		 hiberfil.sys		  'Program Files'	  Users
 bootmgr	 Intel			  'Program Files (x86)'   Windows
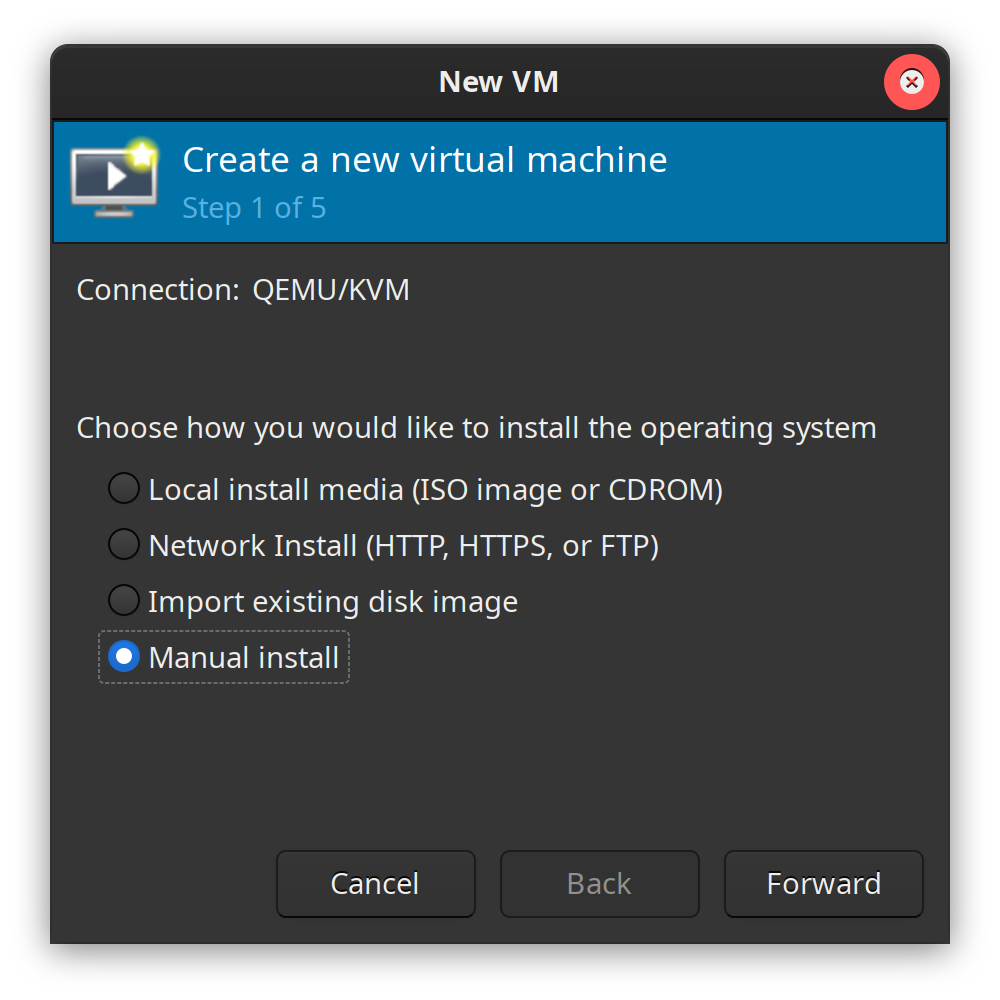
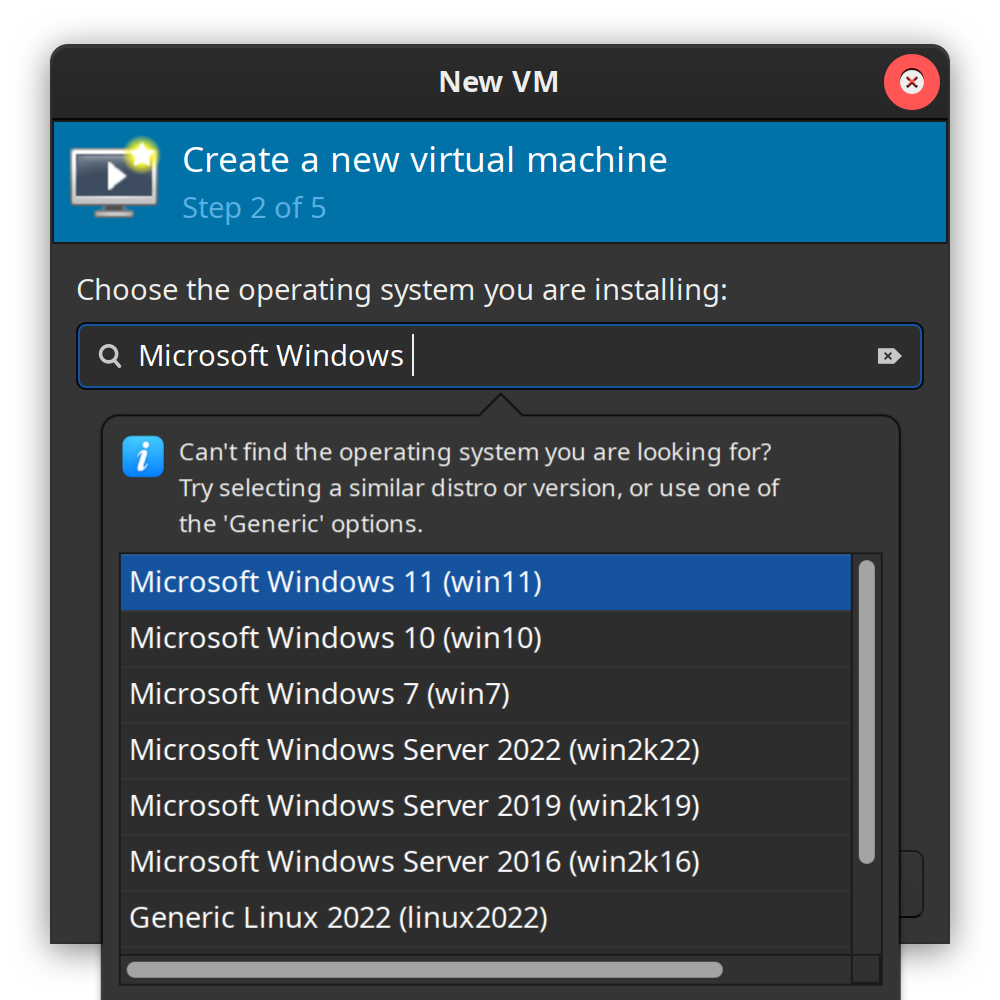
But we’ll want to use the entire multi-partition volume for our new VM. To use it start up virt-manager:

Create a new VM for your cloned physical volume:
Choose the old machine’s OS (or as close to it as possible):
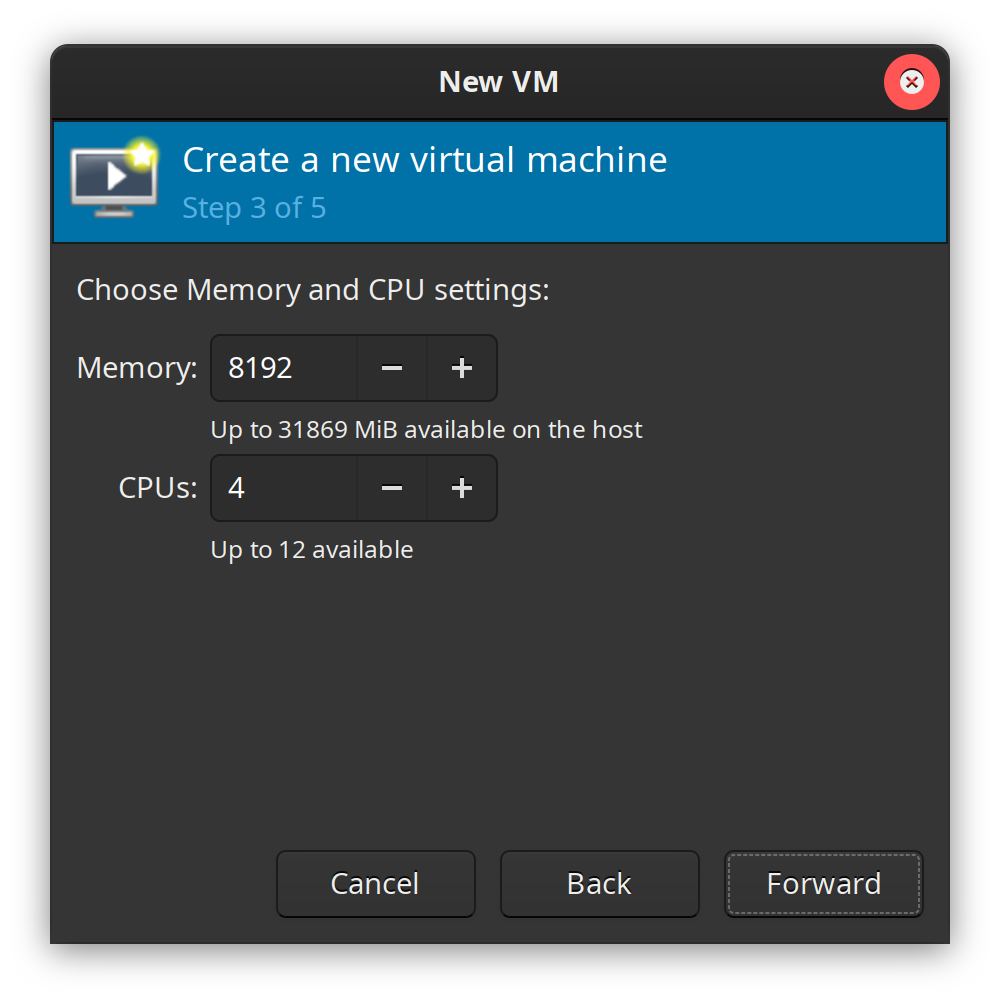
Use a suitable amount of RAM and cores to emulate the cloned machine:
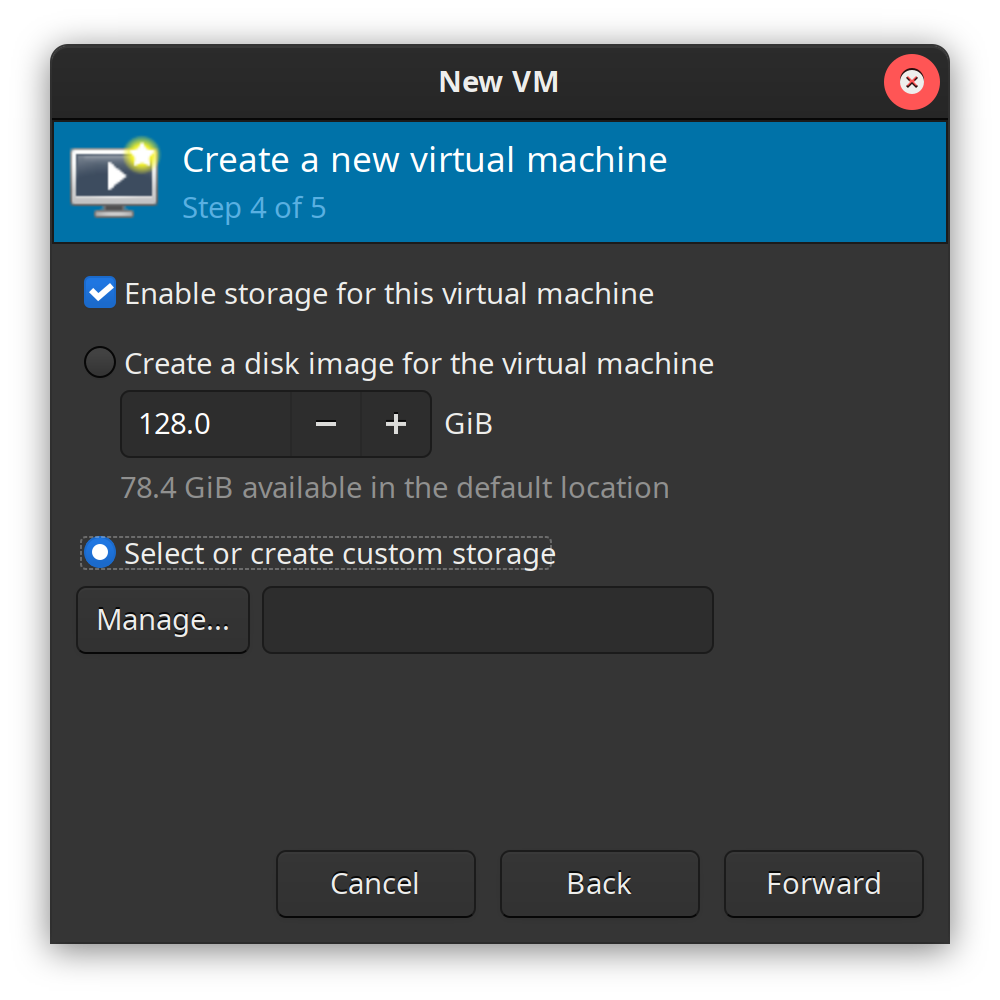
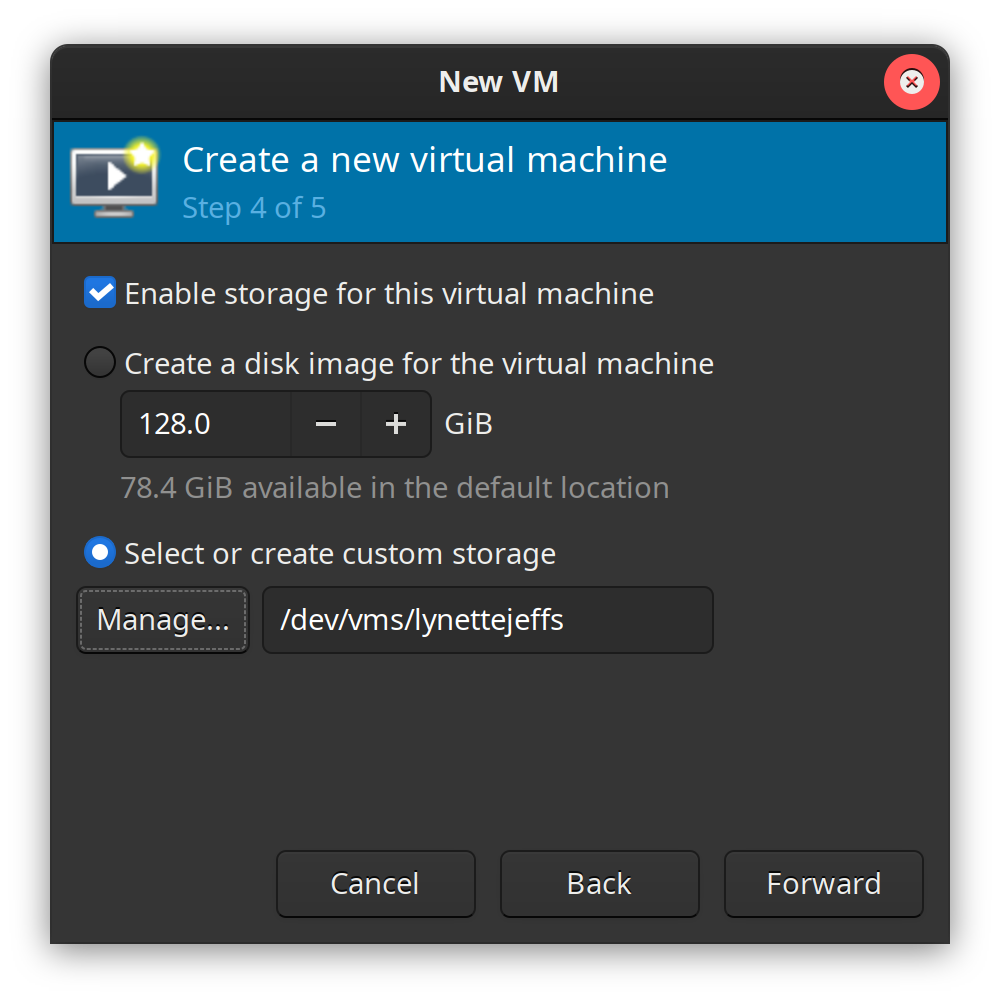
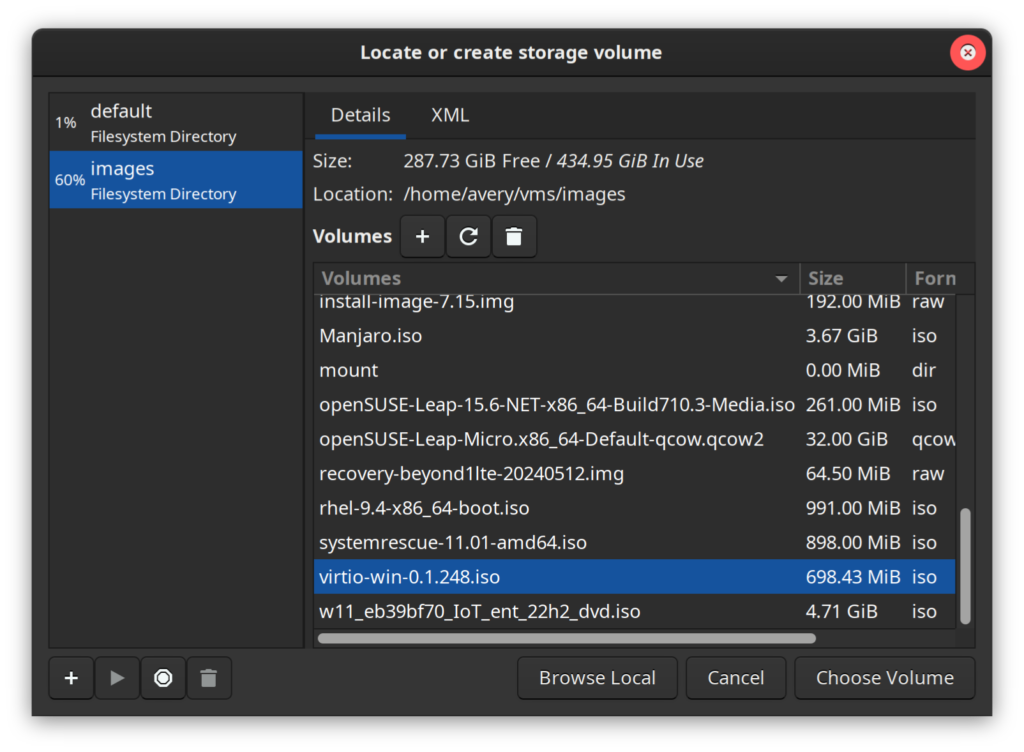
When it gets to the storage question, enable storage and select or create custom storage, then hit manage:
Then hit Browse Local in the next window:
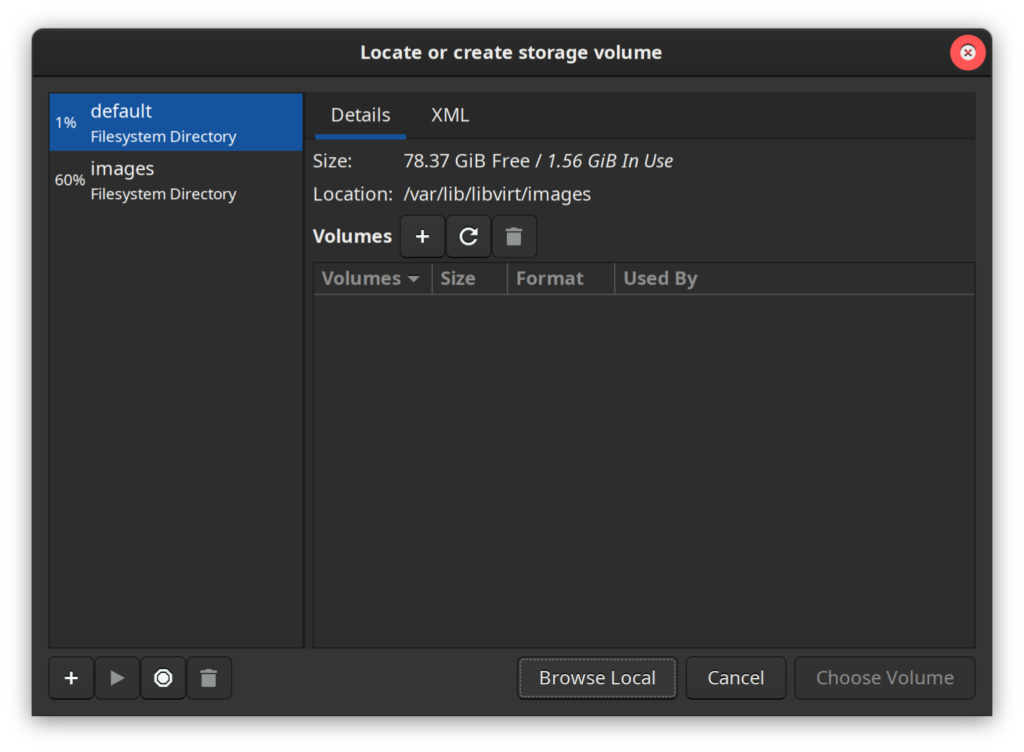
Navigate to /dev/$VG_NAME/$LV_NAME and hit open:
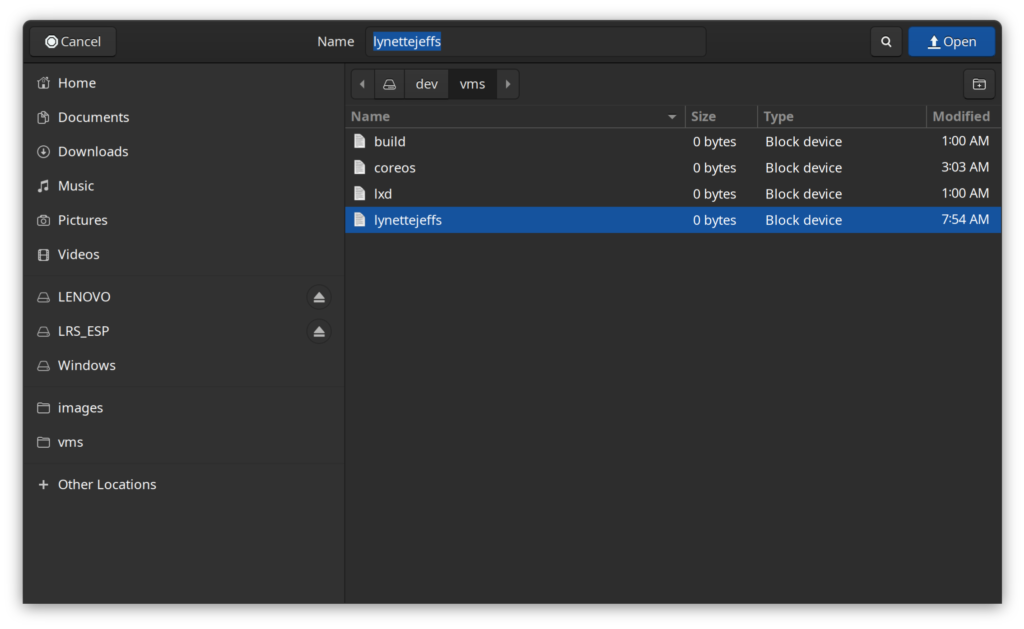
When you get back, it should look like this (if you know the lv device location, you can just type it in next time instead of using the dialog):
Give your VM a memorable name, choose its network (shown here using physical NIC enslaved by Linux bridge, but default virbr0 NAT should be fine):
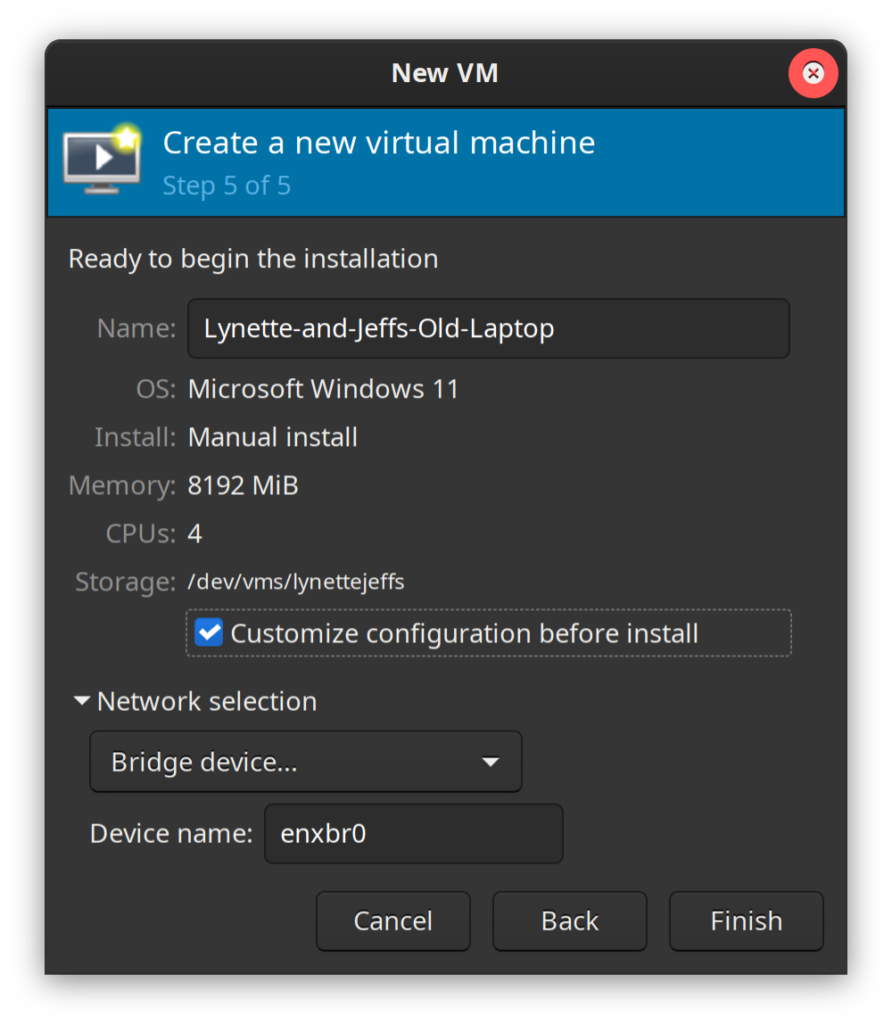
This is all virt-manager specific, but you might want to check and make sure the bootloader infrastructure matches the old machine (e.g. BIOS if it was a CSM bootloader, UEFI, whether to use secureboot, etc.) before you actually create the VM:
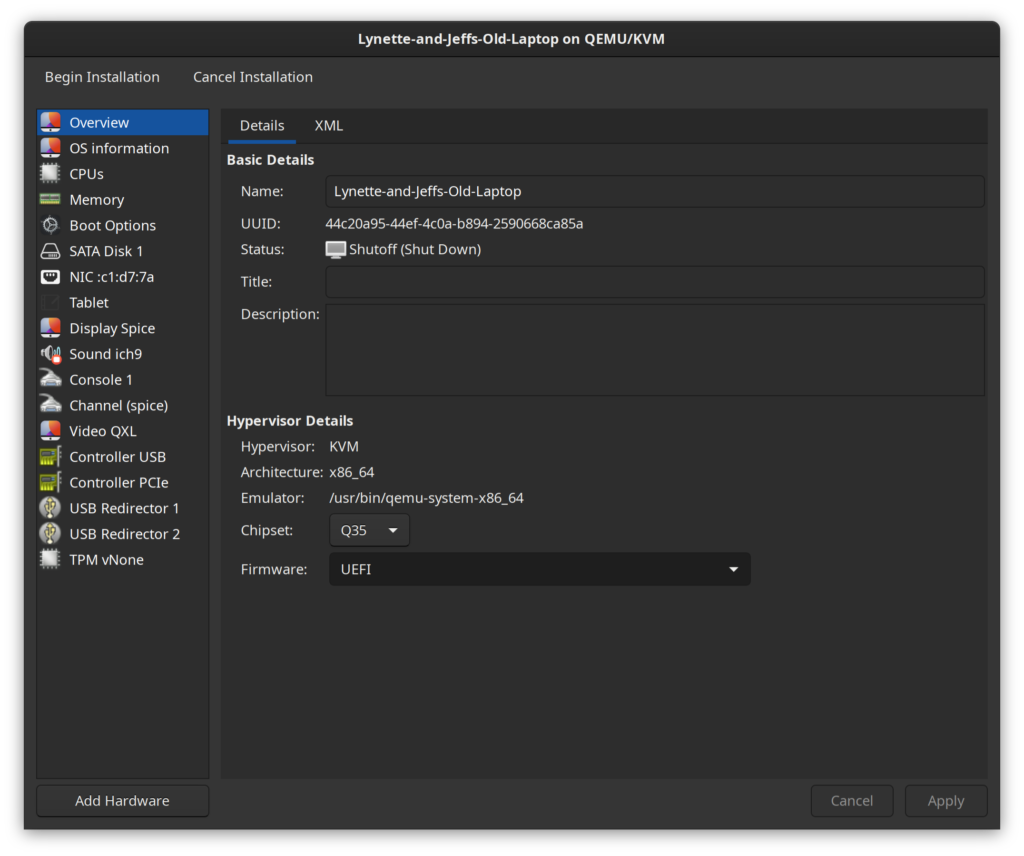
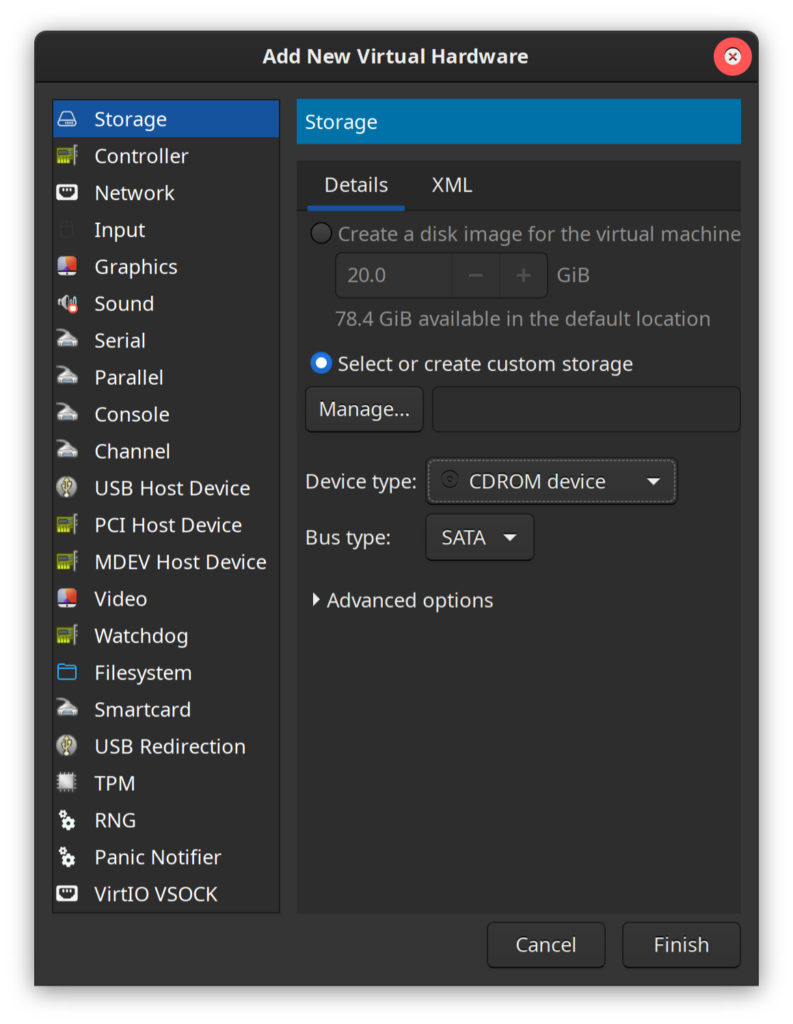
Also, if you have a virtio .iso you want to attach, you can hit Add Hardware and add the a new virtual CD-ROM drive:
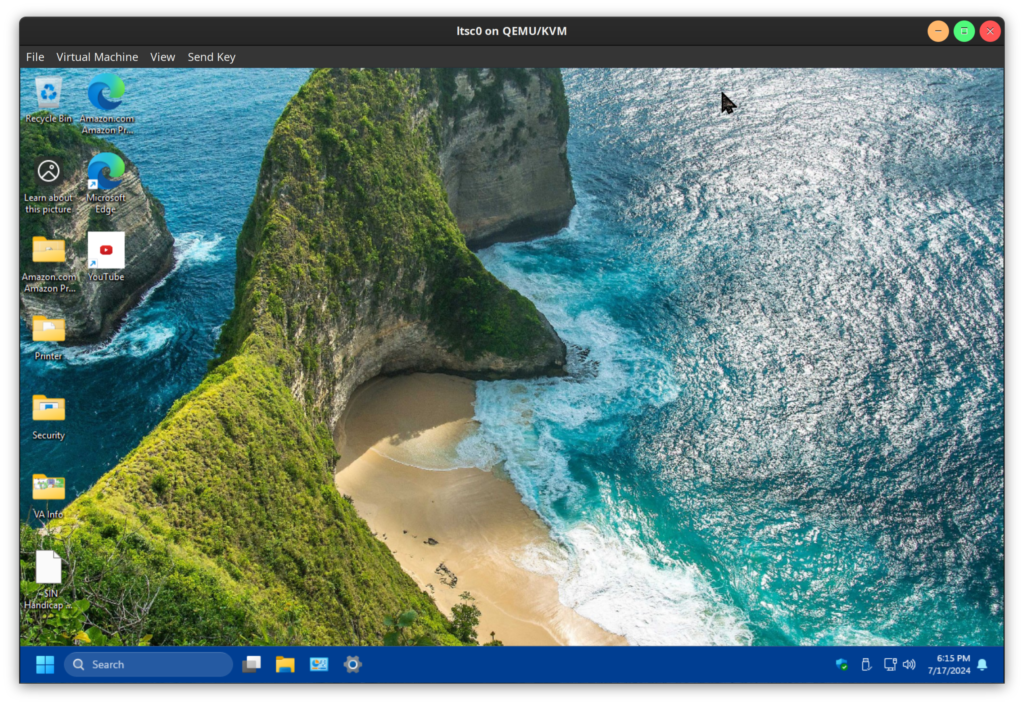
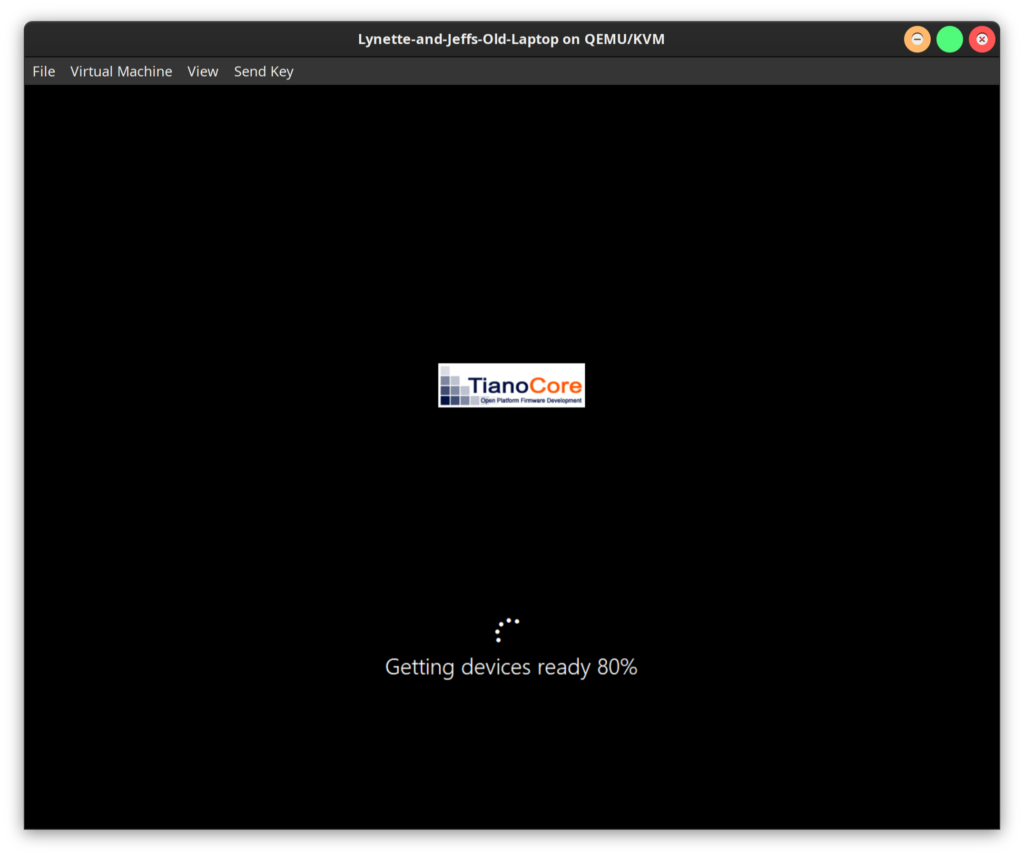
Hit Begin Installation and you should be greeted by the old machine’s drive image telling you it’s figuring out what it’s working with:
If all goes well (your bootloader is matched, there’s no issues with missing keys from the old secureboot infrastructure, etc.) you should be greeted with a pleasantly familiar login screen!
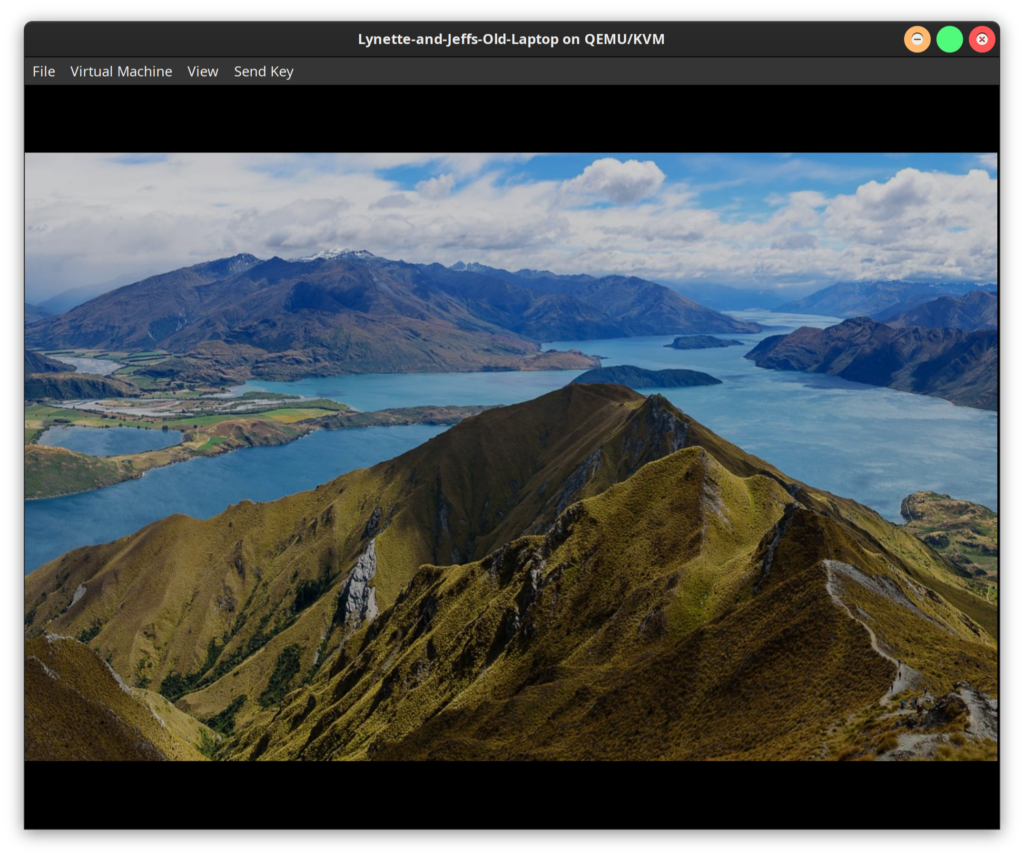
Questions, comments? I’d love to hear from you! Thanks for reading.