Running an Arch Linux Router for About a Year

So, I wasn’t so sure how soon I should write about this, but I have a fiber connection here in Seattle I’m pretty excited about. For the past decade I’d been living in Olympia, WA, where Comcast is the only game in town, and upload speeds are hampered by only having 4 channels across cable (~40Mbps top-out), even for “up to 1200Mbps” service. For anyone who wants to do anything “fun” with their internet, poor upload speeds can be a real hurdle to get over.

Fast forward, and I’ve got my own place, and I’m wanting to run a PC as a router/firewall appliance so I don’t have to be locked into the little proprietary mips box the phone company forces me to rent. So, I set up pfSense since it’s my old go-to, and I am definitely not getting 1Gbps download speeds. In fact, throughput was limited to about 250-300 Mbps. What gives?

That’s pretty unacceptable for the guy who’s been longing for nearly a decade to get their own 1Gbps symmetrical fiber connection. So I throw more hardware at it, thinking it’s a matter of IOPS, but lo-and-behold, even in a VM with 4 cores on a Broadwell E5-2650v3, my speeds seem to be capped around this 250-300Mbps mark.

This is not an new issue: FreeBSD and relatives have had very little attention paid to their drivers for several generations now, as there are not many companies contributing to their source tree anymore (upstream). Certainly not the powerhouse conglomeration of companies contributing to the Linux kernel to keep up all the development in container tech and web servers and what-not. I don’t want to turn this into a BSD v. Linux flame war or anything, because I really don’t care about that, but there are many things that are empirically true about there being a chasm between the two in terms of money being thrown at them (aka developer hours) by the companies that depend on them to operate.

I could have spent my time trying to find better drivers, or compile the Netflix-RACK mods for FreeBSD, as I had in the past for OpnSense the last time I ran into a similar issue – that time, I couldn’t get iperf3 throughput above 2Gbps on a 10Gbps LAN, and in 2019 the writing wasn’t quite on the wall yet that FreeBSD is pretty much a dead OS walking (aka IX-Systems hadn’t ported TrueNAS to Debian and killed off Core yet). The same thing happened to me with my beloved OmniOS, a fork of OpenSolaris, and the birthplace of the ZFS Filesystem – once OpenZFS moved their development platform to Linux in 2017, I sadly admitted it was over – so I know how hard it can be to accept the end of a Unix-like ecosystem.

But this time was different: I had just ditched my VMware vSphere hypervisor cluster when I moved (I hate restrictive licensing). I had been vowing to only use FOSS from then on. And I was really getting back into Arch Linux, refusing to depend on any sort of installer-forward fork like Manjaro or Arco, and wanting to standardize all my systems to a single distro after running different distros and Unices all over the place for different purposes.

So, I thought I should attempt my first roll-your-own router with a general-purpose distro, and since Arch was my go-to at the time, I chose Arch. Yes, for a router. And I’ve been running it for about a year now without any problems.

Proof? Not much, so I’d suppose you’d have to believe me (don’t have much of a poker face), but I did just run a speed test on it to make sure what I’m saying is true:

Bash
 pacman -Qq | grep speed
ookla-speedtest-bin

 pacman -Ql ookla-speedtest-bin | grep '/bin/' #*
ookla-speedtest-bin /usr/bin/
ookla-speedtest-bin 

 speedtest

   Speedtest by Ookla

      Server: CenturyLink - Seattle, WA (id: 8864)
         ISP: CenturyLink
Idle Latency:     2.46 ms   (jitter: 0.05ms, low: 2.40ms, high: 2.50ms)
    Download:   939.19 Mbps (data used: 657.4 MB)                                                   
                  3.75 ms   (jitter: 18.85ms, low: 2.27ms, high: 218.63ms)
      Upload:   932.69 Mbps (data used: 454.0 MB)                                                   
                  3.64 ms   (jitter: 0.24ms, low: 2.97ms, high: 4.46ms)
 Packet Loss: Not available.
  Result URL: https://www.speedtest.net/result/c/cd5545b5-7a9d-4052-9e84-58e1b1b51a0a

*have since aliased ‘grep “/bin/”‘ to something easier to type

You can tell I hadn’t run a speedtest in so long, I had to remind myself the name of the binary so I could run it 😂

Speedtest Result URL: https://www.speedtest.net/result/c/cd5545b5-7a9d-4052-9e84-58e1b1b51a0a

That looks like 1Gbps line-speed to me!

Crazy to use a rolling distribution for an appliance, you say? Hasn’t been bad at all. I keep thinking I should move to a more “stable” distro, or use OpenSUSE TW cuz already-set-up BTRFS snapshots, but I’ve literally have never had a real reason to switch. I haven’t experienced a problem that wasn’t due to an easily solvable configuration issue. There’s been no hard-to-track-down weirdness that appears to come out of nowhere. And since I configured the system as a router myself, I have a pretty good idea of what the components are, what they do, how they should be configured, and where to look if things go wrong.

So, I just make a point to update the package ecosystem about once a week while I babysit the process, usually right before I’m about to go spend the week with my girlfriend.

The first principle I thought would be pretty important for an Arch router would be not to try and do too much with it. It’s a pretty common belief among the sysadmin community, since if you do more than just route or drop packets with it, it’ll be more difficult to troubleshoot things that go wrong, or something else you’re using it for might bring it down.

Whatever too much to do with a router will obviously be subjective, but in exact terms, I’ve been keeping it down to firewalld, hostapd, and systemd-networkd. But who in their right mind would want to run anything more than that on their router, anyway? (looking at you, every CentOS-based router distro ever made!)

Oh, and now I’m running snapperd for snapshots – that’s right, I just set up snapper on it to take a thin-lvm snapshot on boot, which is why I was excited to finally write about it. Check it out:

Laptop router always has a monitor and built-in ~1 hr “UPS”

Oh no, did I forget to mention the best thing about it ever?
My Arch router is the first Thinkpad I’ve ever owned, my as-beloved-as-weathered Thinkpad T520!

It’s always hooked up to a monitor if something goes wrong, and has a built-in 1-hour “UPS” (womp womp)

This one’s touchpad has died twice now, even after I replaced it the first time with a brand-new top cover. So, I was trying to figure out what to do with it, since I am attached for obvious reasons, but it’s a little heavy to lug around and a little shitty to use without a touchpad (is that unreasonable?). I used it as a domain controller for several years running server core 2019, but I ditched the domain when I moved, and needed a gateway more, so … history has been written.

I don’t think many people know, these laptops actually have really nice Intel chipset network adapters – years ago, I noticed it has the same 82574L NIC as a Supermicro X9SCL-F server motherboard, and if you think like I do, yes you can run vSphere on it (however, they’re limited to 16GB ram – yes, at one point I was eyeing a cluster of T520s since they were about $50/ea at the time). This one’s got an i5-2450m processor, with a passmark at 2073, and about a real-world 45w-50w at-wall power consumption with the screen on (20-25w closed). So, it’s not going to burn the house down or throw you into the poor house to be running one 24/7.

What’s more, these old laptops actually have some good expansion capabilities, as PCMCIA is literally a PCI interface. The hardest thing about using PCMCIA was finding a decent 1Gbps PCMCIA network card, but I found the NexExtreme BCM57762, which has been fine. It certainly wasn’t expensive ($10 shipped 3 years ago?) so it makes a damn good router, when you consider the whole thing was destined for a trash compactor.

Kudos to all the other small-timers out there who have written about being nuts enough to run their router on Arch. All the ones I’m seeing right now use netctl – I can’t find the guy’s who set his with systemd-networkd (his blog was pretty flakey), but I’ll put up a repo with the config files, so you guys can peep how I did this…
(repo): https://github.com/averyfreeman/Arch-Router-Laptop

Bash
[root@router avery]# snapper list
# │ Type   │ Date               │ Cleanup │ Descrip
──┼────────┼─────────────────────┼─────────┼────────
0  single                               current     
1  single  17 Jul 03:17:07 PM  number   boot        
2  single  17 Jul 03:27:43 PM  number   boot  
# Table truncated to fit in codeblock

Oh, also, I’ve been running the Unbreakable Linux Kernel with it, since it’s an older kernel with a lot of backports – as of writing, it’s at version v5.15.0-209.161.4. If you visit, don’t forget to hit “tags” so you can find the most appropriate branch, and clone with:
git clone --depth 1 -b $TAG linux-uek-$TAG

Update: I put a little build script for the UEK in the repo

Quick On-The-Fly Batch Processing Using `for` Loop in `cmd` (Windows)

Bats spilling coffee because they hang out upside down
Because .bat file (amirite?)

I thought I’d throw this up real quick, because I am constantly using for loops in bash to do batch processing, but I wasn’t as familiar about how to do them in Windows. Powershell is undoubtedly more powerful, but also incredibly verbose, so if you want to do something quick and simple like this, cmd isn’t too bad, as long as your requirements aren’t overly complicated.

The vcredists-all package in the chocolatey repo appears to be broken, so I set up this super quick and dirty for-loop in cmd for batch-running all the vc runtime installers. I was bootstrapping a new machine that was light on runtimes since it’s … well … new.

Go to the official Microsoft site that has all the VC Redistributable packages listed – it’ll tell you which ones are still compatible with current releases of Windows, and which ones are deprecated. Thankfully, the download links are super easy to find. Download them all by clicking on them one by one (I know, I know …) As of writing there was 8 of them between x86 and x86_64.

Since a lot of them have the same name, you’ll get a lot of vc_redist (2).exe etc. you’ll have to rename manually in the explorer or using ren command to e.g. vc_redist_2.exe and so-on. Make sure there’s no space in the name, and each one is unique. If you have Save As set in your browser, make each name unique them during download, and that they’re all in the same folder.

.bat so silly


Then use dir to list just the vc_redist*.exe files. A quick primer on using dir in scripts, the /B flag is “bare listing”, which is removes any extra information, and lists one file per line (like ls -1). So, from there you can do:

BAT (Batchfile)
C:\User\Downloads> for %i in (vc*.exe) do cmd /c %i

And it’ll open each one individually and walk you through the prompts. Don’t worry about capitalization errors, NTFS is almost always case-insensitive.

Now that I write this, I realize it’d probably been faster to have clicked on each one than to rename half of them to get this to work 🤣 But having a handle on for loops in cmd – or all command interpreters – is a good tool to shovel into your stack heap of potential workflows.

Physical to Virtual Machine Conversion with Virt-Manager Using Thin Volumes for Each VM (aka `Proxmox Style` NoCoW)

The lovely, new, barebones Windows release: IoT Enterprise LTSC 2024

I love Proxmox, but I’ve always preferred to have a more modular style. There’s a lot to be said about ‘batteries included’ hypervisors with all the bells and whistles all set up for you automatically. But what if you want to use other elements of another hypervisor with them not meant for them specifically?

Often modular solutions (aka the greater Linux FOSS ecosystem) are more compatible with other modular solutions than with a 1-size solution OS made by a single vendor. Just like vendors don’t tend to collaborate on Rancher, OpenShift, or Azure, the same goes for Proxmox – but they all contribute to the FOSS solutions upstream. And maybe you want a little more control, a little more ‘vanilla’ upstream positioning, or just prefer the way you’ve been doing things and don’t feel like changing (hand raised), all the solutions and workflows touted by vendors are all re-createable with upstream technologies.

One I’ve thought was really clever is the way Proxmox’s default LVM storage configuration with thin provisioning makes a separate logical volume for each new VM it creates, because then you can make them all RAW images and not have to worry about thick space allocation.

If you have no idea what I’m talking about, imagine this contrived visual analogy: You want to drive a fleet of Ferraris, but you only have room in your garage for a couple Yugos. If you could have a bunch of Ferraris overlap since you only drive them by yourself (imagine they’re new 1-seaters models that could take a 2nd person if you REALLY had to, but, come on, this is ‘merica), and they were still stupid fast, you’d do that, right?

That’s basically what the Proxmox default storage setup seems like to me: All of the great performance aspects of giant, overpowered sports cars the size of lemon-mobiles, the size of which can be fit 4-fold greater in the belly of your McMansion in the ‘burbs.

OK, enough ‘burb chatter, let’s get into the recipe. This is going to be a quick and dirty demo, but it’s basically two posts in one:

  1. Physical to Virtual Machine Conversion (making a ‘real’ PC into a VM)
  2. Setting up a storage solution that emulates Proxmox’s default thin-LVM layout

First, make sure you have a decent QEMU front-end installed. This guide is distro-agnostic, but setting up your front-end is beyond the scope of this article, so I’ll leave that for you to sort out if you need to before you come back.

Note: While you could probably figure out how to adapt this to ‘bare’ QEMU, QuickEMU, or Gnome Boxes, I recommend the libvirtd framework, namely Virsh (CLI) or Virt-Manager (GUI). I’ll be demonstrating the VM portions using Virt-Manager.

Part One:
The Proxmox-Style one LV per VM Storage Configuration

We’ll need:

  1. Either an entire physical disk or a clean partition for our physical volume.
    If you need, you can use a separate partition on a drive with pre-existing partitions for your physical volume, but it needs to be wiped clean first.
    For example:
    /dev/nvme2n1p3 (you can run wipefs -a on this, but NOT sgdisk -Z)
  2. A volume group
  3. A thin pool, and
  4. A new logical volume for each VM
  5. An fstrim timer set

LVM Steps 1 + 2:
Start with prepping the physical volume and volume group. I’ll be using an entire 2TB Samsung pm93a m.2 NVMe as my physical volume, shown here as device /dev/nvme2n1. Your device path will likely be different, use lsblk to ID:

Bash
# Prepping your physical volume
# Make sure you're working on the right drive!
root@nocow:/# lsblk 

# THE FOLLOWING COMMANDS WILL WIPE YOUR DRIVE 
# Don't make a mistake identifying your drive, and 
# don't use your OS drive!
root@nocow:/# wipefs -a /dev/nvme2n1

# Skip the following command if you're using a 
# partition instead of a whole drive!
root@nocow:/# sgdisk -Z /dev/nvme2n1

# Now that you have a bare partition or volume,
# assign a disk to be used by LVM
root@nocow:/# pvcreate /dev/nvme2n1

# Create a new volume group for the thin pool
root@nocow:/# vgcreate vms /dev/nvme2n1

LVM Step 3:
Now that we have the physical volume and volume group prepped, we can create a thin pool for containing the VMs.

You have two options:

  1. You can constrain the pool to an arbitrary size (can be extent or logical) – this is safer, so I’ll start with that (you can always change it later – even while VMs are running!)
  2. OR, you can have the thin pool grow to the size (extents) of the containing volume group automatically

Option 1: Use a pre-determined size for your thin pool.
This one might not use the entire VG, but you can get it as close as possible if you want. And remember, you can overcommit the logical volumes (for each VM) so it doesn’t really matter that much (within reason).

Bash
# The safer option: use part of VG, since I want the option 
# to create another pool outside this one on the same VG
root@nocow:/# lvcreate -L 1400G -Zn -c 128 -T vms/pool

note: -Zn is no auto-discard and -c 128 is 128K cluster size

Option 2: Configure the thin pool grow to the entire size of the VG.
This is nice because you know the pool will automatically take up the entire drive space. The caveat is if you add another drive to the VG with the thin pool configured this way, it’ll automatically expand to take up both the drives.
Be careful if you do this, because thin pools cannot be reduced in size!

Bash
# Take up the entire VG automatically using this command:
root@nocow:/# lvcreate -l 100%FREE -Zn -c 128 -T vms/pool  

# Also, notice the -Zn flag - this is to prevent auto-discard, which
# can pummel your FS IOPS, but you'll need to set an fstrim timer
# to prevent the discarded blocks from eventually taking up the
# entire space of the pool
root@nocow:/# systemctl enable --now fstrim.timer

Either one of these will produce a pool configured something like this (option 1 shown):

Bash
root@nocow:/# lvdisplay vms/pool
  --- Logical volume ---
  LV Name                pool
  VG Name                vms
  LV UUID                rSDH42-DauO-K0pS-vksI-GZhp-L5ay-7jZ90T
  LV Write Access        read/write (activated read only)
  LV Creation host, time WantonWildebeest, 2024-07-14 00:46:33 -0700
  LV Pool metadata       pool_tmeta
  LV Pool data           pool_tdata
  LV Status              available
  # open                 0
  LV Size                <1.37 TiB
  Allocated pool data    71.99%
  Allocated metadata     22.11%
  Current LE             358400
  Segments               1
  Allocation             inherit
  Read ahead sectors     auto
  - currently set to     512
  Block device           252:3

pool will be read-only. Logical volumes contained within are RW

LAST STEP – REALLY IMPORTANT
Notice the -Zn flag – this is to prevent the pool from doing automatic discards, which can pummel your IOPS, but you’ll need to set an fstrim timer to prevent the discarded blocks from eventually taking up the entire space of the pool

I recommend editing the fstrim.timer settings in order to run it every day. Here’s a quick script you can copy/paste to make the edits easy (must run as root – e.g. sudo su):

Bash
systemctl disable --now fstrim.timer
mkdir -p /etc/systemd/system/fstrim.timer.d
printf '[Unit]
Description=Discard unused filesystem blocks once a day
\n[Timer]\nOnCalendar=daily\nRandomizeDelaySec=60sec
Restart=on-failure\n' \
        > /etc/systemd/system/fstrim.timer.d/override.conf
# verifying override.conf
cat /etc/systemd/system/fstrim.timer.d/override.conf

Reload the unit files, start the timer, and make sure it’s running:

Bash
systemctl daemon-reload
systemctl enable --now fstrim.timer
systemctl status fstrim.timer

Don’t forget to exit root when you’re done.

If you’d rather edit the unit by hand yourself, you can run systemctl edit fstrim.timer:

Bash
### Editing /etc/systemd/system/fstrim.timer.d/override.conf
### Anything between here and the comment below will become the contents of the drop-in file

[Unit]
Description=Discard unused filesystem blocks once a day

[Timer]
OnCalendar=daily
RandomizeDelaySec=60sec
Restart=on-failure

### Edits below this comment will be discarded


### /usr/lib/systemd/system/fstrim.timer
# [Unit]
# Description=Discard unused filesystem blocks once a week
# Documentation=man:fstrim
# ConditionVirtualization=!container
# ConditionPathExists=!/etc/initrd-release
# 
# [Timer]
# OnCalendar=weekly
# AccuracySec=1h
# Persistent=true
# RandomizedDelaySec=100min
# 
# [Install]
# WantedBy=timers.target
Bash
# MAKE SURE YOU SET THIS OR DEAL WITH DISCARDS ANOTHER WAY!
root@nocow:/# systemctl enable --now fstrim.timer

Part Two:
Migrating Physical Computers to Virtual Machines

OK, now that we have our thin-pool we’ll be working from, say we have an old drive from a laptop we need to rescue. Take it out of the laptop and attach it using an interface (shown here: USB 3.0 to SATA)

Migrating from physical drive using USB adapter

Create a logical volume in your thin pool the same size or slightly larger than the drive – here, we’ll be rescuing this sad, old a 1TB spindle disk:

Bash
root@wantonwildebeest:/# vgcreate -V 1T -T vms/lynettejeffs  

Then clone the drive to the new LV using your favorite cat, dd, etc. (here, I’ll be using pv because … progress bars…)

Bash
# gotta love progress bars...
root@wantonwildebeest:/home/avery/vms# pv /dev/sdb > /dev/vms/lynettejeffs 
 931GiB 3:09:34 [83.9MiB/s] [==================================================================>] 100% 

Pro tip (optional): If you’re like me, you might be on pins-and-needles about your pool filling up while you’re cloning the drive. You can set up a watch job for the actual data + metadata amount while it’s working.

Remember, although you can virtually over-commit thin volumes, you can’t fill your drive with more data than it holds physically! If it’s dangerously close, abort the clone. If it’s going to go over, or has gone over, delete the clone immediately and think of a new strategy before your entire thin pool becomes inoperable:

Bash
root@wantonwildebeest:/home/avery/vms# watch -n 1 'lvs -o +lv_size,lv_metadata_size,lv_when_full vms/pool vms/lynettejeffs'

That looks like this:

Pro tip: If you need separate partitions from a multi-partition disk image, you can use partx or kpartx (the syntax is the same) to probe the image and map the partitions in /dev/mapper:

Bash
root@nocow# kpartx -a -v /dev/vms/lynettejeffs 
add map vms-lynettejeffs1 (252:14): 0 532480 linear 252:13 2048
add map vms-lynettejeffs2 (252:15): 0 32768 linear 252:13 534528
add map vms-lynettejeffs3 (252:16): 0 969988096 linear 252:13 567296
root@nocow# ls -1 /dev/mapper
control
fedora_fuzzlenobbin-home
fedora_fuzzlenobbin-pool00
fedora_fuzzlenobbin-pool00_tdata
fedora_fuzzlenobbin-pool00_tmeta
fedora_fuzzlenobbin-pool00-tpool
fedora_fuzzlenobbin-root
vms-build
vms-coreos
vms-lxd
# original:
vms-lynettejeffs
# new separate partitions:
vms-lynettejeffs1
vms-lynettejeffs2
vms-lynettejeffs3
vms-pool
vms-pool_tdata
vms-pool_tmeta
vms-pool-tpool

(and from there mount them in your filesystem if you to back something up, etc.)

Bash
root@nocow:/# mount /dev/mapper/vms-lynettejeffs3 mnt
root@nocow:/# ls /mnt
'$GetCurrent'	 bootTel.dat		   OneDriveTemp		  Recovery		       WLAN_1_Driver.log
'$RECYCLE.BIN'	 Config.Msi		   pagefile.sys		  swapfile.sys		       WLAN_2_WiFi.log
'$SysReset'	'Documents and Settings'   PerfLogs		 'System Volume Information'   WLAN.log
'$WinREAgent'	 DumpStack.log.tmp	   ProgramData		  UserGuidePDF
 Boot		 hiberfil.sys		  'Program Files'	  Users
 bootmgr	 Intel			  'Program Files (x86)'   Windows

But we’ll want to use the entire multi-partition volume for our new VM. To use it start up virt-manager:

Create a new VM for your cloned physical volume:

Choose the old machine’s OS (or as close to it as possible):


Use a suitable amount of RAM and cores to emulate the cloned machine:

When it gets to the storage question, enable storage and select or create custom storage, then hit manage:

Then hit Browse Local in the next window:

Navigate to /dev/$VG_NAME/$LV_NAME and hit open:

When you get back, it should look like this (if you know the lv device location, you can just type it in next time instead of using the dialog):

Give your VM a memorable name, choose its network (shown here using physical NIC enslaved by Linux bridge, but default virbr0 NAT should be fine):

This is all virt-manager specific, but you might want to check and make sure the bootloader infrastructure matches the old machine (e.g. BIOS if it was a CSM bootloader, UEFI, whether to use secureboot, etc.) before you actually create the VM:

Also, if you have a virtio .iso you want to attach, you can hit Add Hardware and add the a new virtual CD-ROM drive:

Hit Begin Installation and you should be greeted by the old machine’s drive image telling you it’s figuring out what it’s working with:

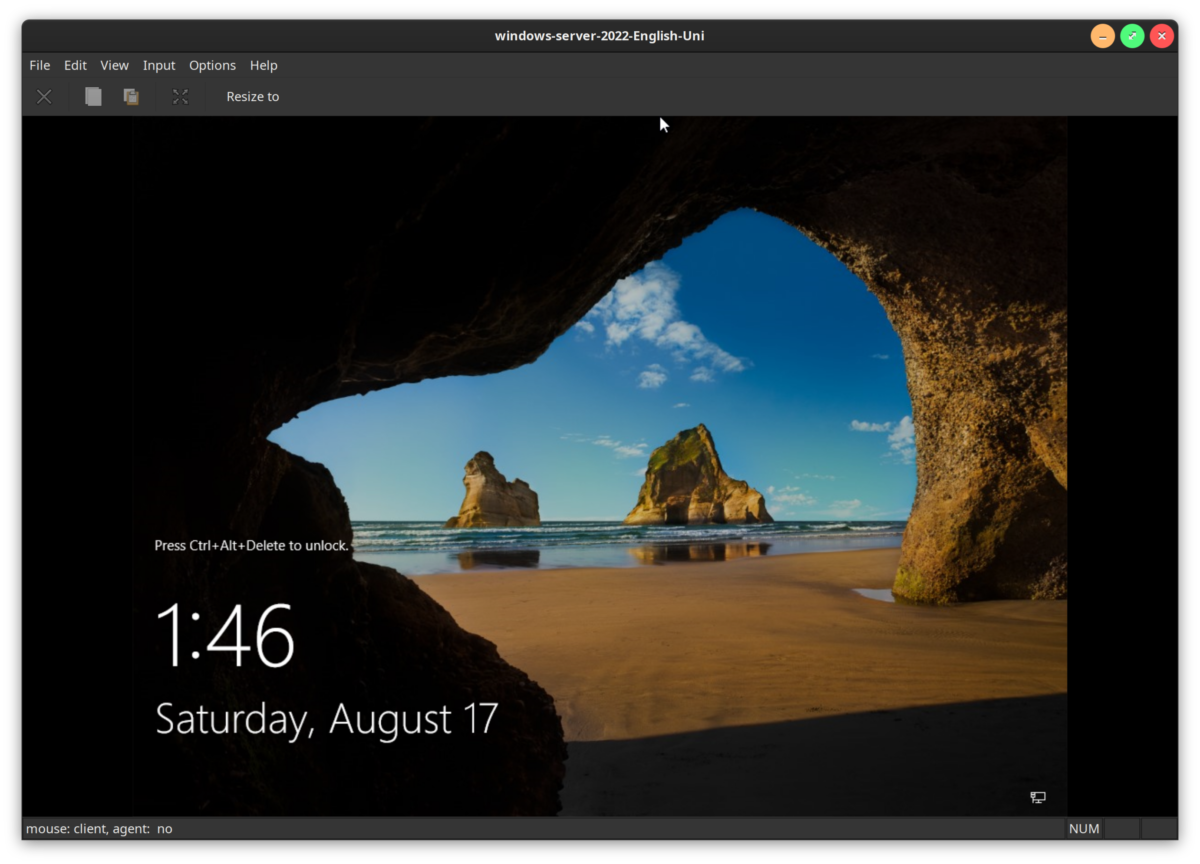
If all goes well (your bootloader is matched, there’s no issues with missing keys from the old secureboot infrastructure, etc.) you should be greeted with a pleasantly familiar login screen!

Questions, comments? I’d love to hear from you! Thanks for reading.

(very) Unscientific ZFS vs XFS + Thin LVM Benchmarks

xfs numbers on left.  zfs numbers on right.
Explaining the feels: XFS + Thin LVM is on the left, ZFS is on the right


I found this screenshot from a couple days ago, but it illustrates something I’ve known subjectively for a long time now: ZFS is the mother of all sequential read filesystems, but it’s quite a bit “slower” than other common filesystems (especially non-cow). That’s mainly because Linux uses a boatload of tiny files necessary to be read at random, and does very little, if any, sequential file serving: Represented here by the two lower fields in these benchmarks.

ZFS definitely has its place, but through using ZFS on root for Linux over the years, it became obvious the machines I installed it on weren’t as “snappy” feeling as when they ran journaling filesystems. These benchmarks aren’t so wildly different I wouldn’t consider it for a good root OS filesystem, though, especially if you need other resources: e.g. snapshots are orders of magnitude less supported on thin-lvm than ZFS.

This particular test comes with another caveat, too: The two SSDs compared in my “test machine” (Dell precision 7730 laptop) are a generation apart, and different sizes: The one with ZFS on it (left) is a 1TB Samsung pm981a and the one running XFS on thin LVM is a 2TB Samsung pm9A3. However, it was taken on a fresh installation of Ubuntu 24.04 on ZFS (no encryption) with completely stock partition setup. The bus only supports PCIe 3.0, so the pm9a3 has no advantage there.

This quick test was mostly done on a lark, but for my own curiosity I’ve been planning to do more benchmarks comparing compression using kvdo vs. ZFS + lz4 or zstd, and for those benchmarks I’ll use two separate, empty PM981a drives so it can be a more apples-to-apples comparison. If you like these kind of benchmarks, watch this space.

Celebrate your Annual `Octocat Day`?

Adorable website throws confetti in celebration of your GitHub join date:
Useful, since after 30 days join date is difficult to find

Octocat Birthday celebration site unsurprisingly located on… wait for it…
GitHub Pages: https://nomangul.github.io/octocat-day/

I thought this was so cute, I thought I’d put it up real quick. I found it while wondering in earnest when I had signed up for GitHub. Turns out it was a lot earlier than I remembered – not that I’ve been active the entire time.

I found it rather unusual that, while other platforms like Twitter gleefully display your join date on your profile page, GitHub not only obscures the date you joined after 30 days of membership, but Google is awash with discussions about how to obscure its visibility even before 30 days is over.

One example of many: https://stackoverflow.com/questions/66988864/is-it-possible-to-hide-joined-date-of-github

What’s wrong? Are people afraid of looking … uncommitted? (womp womp)

It’s a little ridiculous, since version control activity was never meant to be a competition, but I understand perhaps dates might not align with embelleshments (intended or inadvertant) made while seeking employment. Not casting aspersions, since I couldn’t remember when I joined, either!

Maybe if GitHub were more forthcoming about user join date, it’d be easier to provide accurate information. But, thanks to Octocat Day tool coming to the rescue, users can be reminded of when they joined the site with a celebration replete with confetti. 🥳

Thanks to @Nomangul for making this one.

Repo: https://github.com/nomangul/octocat-day/

Have I really not written about `rsync`?

Kyun-Chan, a shy, Japanese pika disguised as a deer

There’s lots of great backup tools out there – borg, rdiffbackup, bareos, zfs and btrfs send/receive, pvesync, etc. and the cutest mascotted backup program ever, of course, pikabackup (it’s adorable!) all with their own traits and best-practice use cases.

I have to say, though, call me DIY, a glutton for punishment, or just plain nerdy, but I really like my hand-written backup scripts more than anything else. Part of it is because I want to know what is happening in the process intimately enough that debugging shouldn’t be a problem, but I also find something satisfying about going through the process of identifying what each flag will do and curating them carefully for a specific use case, and (of course) learning new things about how some of my favorite timeless classics.

rsync is definitely one of those timeless classics. It’s to copying files what ssh is to remote login: Simultaneously beautiful and indispensable. And so adaptable to whatever file-level copy procedure you want to complete. For example, check out what the Arch wiki suggests for replacing your typical copy (cp) and move (mv):

# If you're not familiar, these are bash functions
# source: https://wiki.archlinux.org/title/rsync
# guessing cpr is to denote 'cp w/ rsync'

cpr() {
rsync --archive -hh --partial --info=stats1,progress2 --modify-window=1 "$@"
}

# these are neat because they're convenient and quiet

mvr() {
rsync --archive -hh --partial --info=stats1,progress2 --modify-window=1 --remove-source-files "$@"
}

It seems rsync flags are pretty personal, if someone’s familiar, usually they’ll have some favorite flags – whether they’re easy to remember, they saw them somewhere else, or think they look cool to type. I know for me, mine are -avhP for home (user files) and -aAvX for root (system files), but I painstakingly researched the documentation for this next script to create my own systemd.timer backups to (you guessed it) rsync.net:

Bash
TIMESTAMP="$(date +%Y%m%d_%Hh%Mm)"
LOGFILE="$HOME/.var/log/$TIMESTAMP_rsyncnet.log."
BATCHFILE=$HOME/.var/log/$TIMESTAMP-rsyncnet.sh
EXCLUDE_LIST={"*.iso","*.ISO","*.img",".asdf","build",".cache",".cargo",".config/google-chrome/Default/Service\ Worker/CacheStorage",".conda","containers",".cpan",".docker","Downloads",".dotnet",".electron-gyp","grive","go",".java",".local/share/flatpak",".local/share/Trash",".npm",".nuget","OneDrive",".pnpm-store",".pyenv",".rustup",".rye",".ssh",".var","Videos","vms",".yarn"}

rsync --log-file=$LOGFILE \
    -AcDgHlmoprtuXvvvz \
    --ignore-existing \
    --fsync --delete-after \
    --info=stats3,name0,progress2 \
    --write-batch=$BATCHFILE \
    --exclude=$EXCLUDE_LIST \
    $HOME $RSYNCNET:$(hostname); \
    ssh RSYNCNET cp $LOGFILE $(hostname)/.

where $LOGFILE is the (very detailed) log of the backup, $TIMESTAMP is the time the script is invoked, and the $EXCLUDE_LIST is stuff I don’t want in my backups, like folders from other cloud services, browser cache, $HOME/.ssh, development libraries, flatpaks, and build directories for AUR and git repos.

A quick note about --exclude, it can be a little fiddly. It can be repeated for one flag at a time without an equals sign, e.g. --exclude *.iso --exclude ~/Videos, but if you want to chain them together, then they need the equals sign. I had them working from a separate file once years ago with each pattern on separate lines, but now I can’t remember how I did it, so the big one-line mess with curly braces, commas, and single-pattern quotes is how I’ve been rocking it lately. It’s ugly, but it works.

Here’s the manual for rsync in case you actually want to know what the flags are doing (definitely recommend it): https://linux.die.net/man/1/rsync

And another quick, but good, rsync reference by Will Haley: https://www.willhaley.com/blog/rsync-filters/ – this guy does all sorts of interesting stuff, and I liked his granular, yet opinionated, walk-through of rsync: how he sees it. (spoiler: two people’s rsyncs are rarely the same)

Of course, file-level backups are not the same as system images, and for that I use fsarchiver. If you’re not familiar, I definitely recommend checking them, and their awesome Arch-Based rescue ISO distro out: https://www.system-rescue.org/

I wrote my own script for that, too (of course), but I’ll probably link it in a repo since it’s quite a bit longer than the script for rsync. It is timed to run right before the rsync backup, in the same script, along with dumps of separate lists of my supported dist (pacman -Qqe) and AUR (pacman -Qqm) packages.

Oh, and also, if you ever need to do file recovery, check out granddaddy testdisk: https://www.cgsecurity.org/testdisk_doc/presentation.html

What’s your favorite backup software, and why? Any stories about how they got you (or failed to get you) out of a bind? Unfortunately, everybody’s got one these days… would love to hear about them in the comments below…

Benefactors, Meet Cartography: Using Public Disclosure Data for a Geospatial Graph with Python, Pandas, GeoPandas and Matplotlib

I was looking at datasets on data.wa.gov to see what might be fun for a project, and I came across public info disclosing the amount paid to employ WA state lobbyists. It’s a very localized representation of interests attempting to influence politics and policy for our residents and lawmakers, as it represents money spent only inside Washington State.

When I first peeked at the top of the tables, I saw disclosures from “ADVANCE CHECK CASHING” in Arlington, Virginia. I didn’t expect it at first, but I began noticing quite a few other firms lobbying us are also located outside our state. Since the level to which out-of-state firms are lobbying us isn’t something I think I’ve ever heard discussed, I became more curious about what story I could illuminate through visualizing the numbers.

If you’d like to see the source code, I created a repo on GitHub: https://github.com/averyfreeman/Python_Geospatial_Data/tree/main

The charts are generated with Matplotlib, which is a popular attempt to emulate MATLAB, the uber-capable and even more expensive software with technology previously accessible only by government, engineering firms, multinational corporations, and the ultra-wealthy. The data manipulation library is called Pandas, which is somewhat analogous to Excel, but hard to imagine when considering there’s no pointing or clicking, since there’s no user interface: All the calculations are constructed 100% with code.

This system actually has its benefits: Try loading a 35,000,000 row spreadsheet and you’re likely to have a bad time – the number of observations you can manipulate in Python dwarfs the capabilities of a spreadsheet by an insurmountable margin. I even tried to load the 12,500 row dataset for this project into Libreoffice, and the first calculation I attempted crashed immediately. And additionally, even though there’s a steeper learning curve than Excel, once people get the hang of using Pandas they can be more productive, since it’s not bogged down by all that pointing and clicking.

The data I used comes from the Public Disclosure Commission, and an explanation of the things people report are listed here: https://www.pdc.wa.gov/political-disclosure-reporting-data/open-data/dataset/Lobbyist-Employers-Summary

There’s too many columns in the disclosure data to meaningful concentrate on the money coming from each state, so I immediately narrow it down to three columns. Here, you can also see that it’s a simple .csv file being read into Python:

Bash
def geospatial_map():

    our_cols = {
        'State': 'category',
        'Year': 'int',
        'Money': 'float',
    }

    clist = []
    for col in our_cols:
        clist.append(col)

    df = pd.read_csv(csvfile, dtype=our_cols, usecols=clist)

That comes out looking like this:

Bash
print(df.head())

   Year                 State      Money
0  2023  District of Columbia 497,305.43
1  2023            California 496,301.52
2  2022            California 446,805.56
3  2022  District of Columbia 437,504.86
4  2021            California 430,493.96

I haven’t tried it yet, but the dataset website, data.wa.gov, and all the sister-sites that are hosted on the same platform (basically every state, and the US government) have an API with a ton of SQL-like functions you can use while requesting the data. This is an amazingly powerful tool I am definitely going to try for my next project. You can read about their query functions here, if you’re curious: https://dev.socrata.com/docs/functions/#,

I took a pretty manual route and created my own data-narrowing and typing optimizer script, so the form it was in once I started making the charts was pretty different than its original state, but it helped to segment the process so I could focus on the visualization more than anything else once I got it to this point.

I still had to make sure the numbers columns didn’t have any non-numerical fields, though, otherwise they’d throw errors when trying to do any calculations. To avoid that pitfall, I filled them with zeros and made sure they were a datatype that would trip me up, either:

Bash
    df.rename(columns=to_rename, inplace=True)
    df['State'] = df['State'].fillna('Washington').astype('category')
    df['Year'] = df['Year'].fillna(0).astype(int)
    df['Money'] = df['Money'].fillna(0).astype(float)

Then, I wanted to make sure the states were organized by both state name and year, so I pivoted the table so states names were the index, and a column was created for each row. That single action aggregated all the money spent from each state by year, so at that point I had a single row per state name and a column for each year.

Bash
    # pivoting table aggregates values by year
    dfp = df.pivot_table(index='State', columns='Year', values='Money', observed=False, aggfunc='sum')
    
    # pivot creates yet more NaN - the following avoids peril
    dfp = dfp.fillna(value=0).astype(float) 

    # some back-of-the-napkin calculations for going forward
    first_yr = dfp.columns[0]            #    2016
    last_yr = dfp.columns[-1]            #    2023
    total_mean = dfp.mean().mean()       # 391,133
    total_median = dfp.median().median() # 141,594

It’s easier to see it than imagine what it’d look like (the dfp rather than df variable name I created to denote df pivoted):

Bash
# here's what the pivoted table looks like:
print(dfp.head())

Year               2016         2017         2018  ...         2021         2022         2023
State                                              ...                                       
Alabama            0.00         0.00         0.00  ...         0.00         0.00       562.50
Arizona      156,000.00   192,778.93   231,500.00  ...   264,334.00   170,300.00   205,250.00
Arkansas      94,924.50   128,594.00   121,094.00  ...   120,501.00   104,968.84   103,384.62
California 2,606,222.26 3,232,131.73 3,751,648.42  ... 5,261,021.97 5,491,396.87 6,200,283.10
Colorado     215,818.82   195,463.67   192,221.84  ...   233,031.86   289,434.81   157,109.81

Now, on to the mapping. There’s GeoJSON data on the same web site, which can deliver similar results to a shape file (in theory), but for this first project I made use of the geospatial boundary maps available from the US Census Bureau – they have a ton of neat maps located here: https://www.census.gov/geographies/mapping-files/time-series/geo/carto-boundary-file.html (I’m using cb_2018_us_state_500k )

Bash
    shape = gpd.read_file(shapefile)
    
    shape = pd.merge(
        left=shape,
        right=dfp,
        left_on='NAME',
        right_on='State',
        how='right'
    )

The shape file is basically just like a dataframe, it just has geographic coordinates that allow Python to use for drawing boundaries. Conveniently, the State column from the dataset, and NAME column from the shape file had the same values, so I used them to merge the two together.

Bash
         NAME LSAD         ALAND       AWATER  ...         2021         2022         2023  8 year total
0     Alabama   00  131174048583   4593327154  ...         0.00         0.00       562.50        562.50
1     Arizona   00  294198551143   1027337603  ...   264,334.00   170,300.00   205,250.00  1,818,537.93
2    Arkansas   00  134768872727   2962859592  ...   120,501.00   104,968.84   103,384.62  1,006,918.19
3  California   00  403503931312  20463871877  ... 5,261,021.97 5,491,396.87 6,200,283.10 37,839,827.01
4    Colorado   00  268422891711   1181621593  ...   233,031.86   289,434.81   157,109.81  1,961,231.65


Then I animated each year’s dollar figures a frame at a time, with the 8-year aggregate calculated at the end, with the scale remaining the same to produce our dramatic finale (it’s a little contrived, but I thought it’d be fun).

At this point in the code base, it starts going from pandas (the numbers) and geopandas (the geospatial boundaries) to matplotlib (the charts/graphs/figures), and that’s where the syntax takes a big turn from familiar Python to imitation MATLAB. And it takes a bit to get used to, since it essentially has no other analog I’m familiar with (feel free to correct me in the comments below)

And it’s a very capable, powerful, language, that also happens to be quite fiddly, IMO. For example, this might sound ridiculous to anyone except people who’ve done this before, but these 4 lines are just for the legend at the bottom, with the comma_fmt line being solely responsible for commas and dollar signs (I’m not joking).

Bash
    norm = plt.Normalize(vmin=all_cols_min, vmax=upper_bounds)
    comma_fmt = FuncFormatter(lambda x, _: f'${round(x, -3):,.0f}')

    sm = plt.cm.ScalarMappable(cmap='RdBu_r', norm=norm)
    sm.set_array([])  # Only needed for adding the colorbar
    colorbar = fig.colorbar(sm, ax=ax, orientation='horizontal', shrink=0.7, format=comma_fmt)

But it’s all entertaining, nonetheless. I also did a horizontal bar-chart animation with the same data, so the dollar figures would be clear (the data from these charts perfectly correlate):

Most other states don’t have that much of an interest in Washington State politics, but there’s enough who do for it to make it interesting to see where the money is coming from. Although, I have to say, when I first charted this journey by laying eyes on a check cashing / payday loan company, it wasn’t a huge surprise.

Some other interesting info has more to do with spending by entities located inside Washington state – and to be clear, spending from inside the state far outpaces spending from outside, for obvious reasons. These two graphs are part of a work in progress. They’re derived from same dataset, but with a slightly different focus: Instead of organizing these funding sources by location, they focus on names and display exactly who is hiring the lobbyists, and, perhaps more importantly, for how for much. For example, here’s the top 10 funders of lobbyists in WA by aggregate spending:

It’s been a really fun project, and I hope I have opportunities to make more of them going forward. So many things in our world are driven by data, but the numbers often don’t speak for themselves, and our ability to tell stories with data and highlight certain issues is a necessity in conveying the importance of so many salient issues of our time.

I’ll definitely be adding more as I finish other charts, and demonstrations through a jupyter notebook. I am also really anxious to try connecting the regularly updated data through the API, which I already have access to, I just have to wire up the request client – easier said than done, but I’ve been able to do it before, so I am confident I’ll be seeing more of you soon. Thanks for visiting!

Arch Linux for Windows: Now available from the Microsoft Store

Looks like I’m not the only one who noticed

Does anyone else sense the irony?

Yes, Arch Linux is available from the Microsoft Store, and no, I’m not kidding. Go ahead and see for yourself: https://apps.microsoft.com/detail/9mznmnksm73x?hl=en-us&gl=US

My immediate reaction when I saw this was, “woah, really?”, “that’s crazy”, and, “I never thought I’d see this day”, and I wonder if it’s as jarring to other people who haven’t grown up with Microsoft being such a behemoth in the news and in their lives.

I think my dad might have joked once, “if I had bought shares in Microsoft when you were a kid, instead of your Speak n’ Spell, we’d both be retired by now.” I remember being horrified by the suggestion, too. “No, dad! Really? My Speak n’ Spell?”

Most people saw over the years that Microsoft’s success was less of a testament to their ability to innovate, but to engage in monopolistic business practices. And it was certainly effective: Microsoft was ubiquitous, and everyday people across the country fantasized about where they might be had they bought stock in MS while they could afford it.

Having grown up hearing about them choking the competition all my life is certainly one of many reasons seeing Arch Linux in the Microsoft store is really super shocking. 😳

What’s next, Microsoft open sourcing their technologies?

😳

Back in the late ’90s / early ‘2000s, when the internet was still relatively new, Friendster was a thing, and RedHat was the only distro I’d ever heard of by name, there was a palpable sense that nothing would ever disrupt the Windows/MacOS duopoly, or cause them to reexamine their ultra-competitive business models.

The closed-intellectual property business model of Microsoft (and even more rabidly authoritarian monopolistic single-hardware vendor to walled-garden ecosystem Apple) seemed like one constant that would change about as much as death or taxes. Nobody expected Microsoft would start to give up its iron grip on source code, or start to even publish and market its own services using a Linux Operating System. (Yes, I’m looking at you, Azure hosted Kubernetes)

Bill Gates was still CEO, and they’d just had a hugely consequential precedent-setting battle in the courtroom for breaking anti-trust laws.

Microsoft bought or suffocated any decent competition, and leveraged their market proliferation into monopolization wherever it could. They eventually lost their lawsuit after several years of defending their position to achieve defacto omnipotence. It was surprising to see such a large, powerful company actually lose in court, but many saw the loss as a testament to how many bad faith business practices MS had engaged in. You have to be pretty anti-competition in this day and age to get charged by the federal government.

With a reputation like they had at the time, Anyone who knew anything about Microsoft was convinced they’d be going the locked-down software-selling, IP hoarding route forever. And while they’re certainly not perfect, they’re certainly engaging in practices I’ve never expected from them. Not in a million years.

The Microsoft I remember would have attempted to make it harder to run other company’s software. They’d never dream of providing Kubernetes on Azure with Linux containers, they’d make them all run Windows at $149 a pop, and force everyone to keep a copy of “MS Azure Browser” on their desktop.

And while I applaud MS for not pushing the boundaries of price elasticity as much as most other megacorps these days (i.e. Windows is still “only” $149) Linux’s source code is distributed for free in a way everyone can examine, so it’s hard to see how they could use their previously archetypal hoard-and-license IP business strategy.

What’s going on here? Are things actually changing?

To be clear, I know this distribution of Arch Linux for WSL has nothing to do with Microsoft really, other than it’s packaged for their proprietary VM layer on their still-$149-a-license operating system. But how jarring it is for me personally to see Microsoft change in this manner is pretty hard to overstate. I know MS is still making boatloads of money, but it’s amazing that something, or someone, could shake up the paradigm of how Microsoft Makes Money so fundamentally. And whether that was their intention, or it is simplyan artifact, there’s one person I believe we can point to for this eventually occurring (albeit, over the course of about 30-40 years):

Richard Stallman is the creator of the GNU Public License. Seen here playing your friend’s hippy dad taking you both to a cookout, he is the original stalwart advocate for free software distribution.

Stallman and his brainchild, the GPL, have been making the case that developers (and software companies) shouldn’t just release their code so people can know what it’s doing, but if they adopt any code released under GPL they are essentially forced to. Many other types of free distribution licenses allow companies to eventually close their source code and hoard their IP. There are plenty of reasons to do that, like security, competition, and market share. And if I understand correctly, it was an essential reason companies like Nintendo and Apple chose BSD for their OS platforms instead of Linux.

This is not meant to be a bash against companies for being greedy, under capitalism it’s essentially their main job. But it’s possible to be altruistic and make money. I don’t have any empirical evidence to support this suggestion, but I imagine enough developers realized hoarding IP is a barrier to improving technology, and whether for altruism, concerns about long-term self-preservation, or because their program relies heavily on a gzip library, enough people have gotten onboard with open-sourcing technology that it’s even been championed by Microsoft.

I have to pause a second to take that in. Microsoft has been the poster child of IP hoarding since their inception in 1980. By no means was adopting a license that would require developers and software companies to release their source code a fait accompli, but I suppose enough developers understood how much more rapidly we would progress collectively if we all shared information about how to do things. And for the rest of us who don’t make a habit of examining questions of existential importance on a daily basis, we probably just fell into it by proximity and convenience.

But realistically speaking, it also gives me pause to think of how much progress me might not have made if it weren’t for the open source community (regardless of license). What might not have been. Where we’d still be today. If, by 2024, open sourcing hadn’t proliferated so profoundly, we wouldn’t still be searching Alta Vista, trying to make out HTML tables on our flip phones.

And I say this gratefully, and without any sense of irony, that, for one reason or another, we all have Richard Stallman to thank for releasing Arch Linux in the Microsoft Store. Thank you, Richard!

And also probably because of all the parents who had the presence of mind to buy their kids Speak n’ Spells.

Using `grep` to focus only on that which is important

How can grep clear the clutter obstructing our goals?

This is a little beginner command-line demonstration for finding the results you need most. A lot of the time in the command line, a simple ls can return way more than any one person can reasonably deal with. Most people know how to use ls with extension flags: ls *.sh ; ls -a ; ls -a .??* , but what about situations when file extensions aren’t relevant, or when doing other things?

For those who don’t already know, grep is your spectacularly special search superhero you can use to slice and dice strings in a smattering of situations – and here’s a few instructive ways it can be used to make life easier when looking for something.

Say I’m troubleshooting kernel-install. kernel-install is an intrinsic part of making sure kernels are installed properly, but on most (if not all) distros, it’s packaged with systemd, a fairly sprawling package with tentacles in virtually everything. How can we sift through the systemd package to narrow down what we’re looking for, so our search becomes less overwhelming?

Bash
 pacman -Ql systemd | wc -l
1450

A quick analysis of the number of lines contained in the systemd package is 1,450 lines! That’s a lot of stuff to sort through in order to find a rather narrow section of it we need for our issue. That’s where some strategic use of the grep command can come in handy:

Bash
 pacman -Ql systemd | grep -v -E 'zsh|bash|man|polkit|locale' | wc -l
873

I usually start by thinking about what I don’t want in the results, since there’s almost always a lot more of what we don’t need than what we do need.

This filter with grep -v does the opposite of what grep does by default, and removes everything in a given search string. By using -E we can chain strings together, as if to instruct grep not to return results with any of these values (note the single quotes and pipe character separators)

If we use grep to omit all zsh functions, bash-completions, man files, polkit definitions, and locale settings, that can get us a little closer, but it’s still only narrowed down by 577 results. systemd is a lengthy package, indeed.

Bash
 pacman -Ql systemd | grep -v -E 'zsh|bash|man|polkit|locale' | grep kernel
systemd /etc/kernel/
systemd /etc/kernel/install.d/
systemd /usr/bin/kernel-install
systemd /usr/lib/kernel/
systemd /usr/lib/kernel/install.conf
systemd /usr/lib/kernel/install.d/
systemd /usr/lib/kernel/install.d/50-depmod.install
systemd /usr/lib/kernel/install.d/90-loaderentry.install
systemd /usr/lib/kernel/install.d/90-uki-copy.install
systemd /usr/lib/systemd/system/sockets.target.wants/systemd-udevd-kernel.socket
systemd /usr/lib/systemd/system/sys-kernel-config.mount
systemd /usr/lib/systemd/system/sys-kernel-debug.mount
systemd /usr/lib/systemd/system/sys-kernel-tracing.mount
systemd /usr/lib/systemd/system/sysinit.target.wants/sys-kernel-config.mount
systemd /usr/lib/systemd/system/sysinit.target.wants/sys-kernel-debug.mount
systemd /usr/lib/systemd/system/sysinit.target.wants/sys-kernel-tracing.mount
systemd /usr/lib/systemd/system/systemd-udevd-kernel.socket

 pacman -Ql systemd | grep -v -E 'zsh|bash|man|polkit|locale' | grep kernel | wc -l
17

From there, I realize we got lucky looking for kernel-install, since anything related to it is likely to have the word kernel in it. A quick addition of grep kernel as a subsequent filter on the end narrowed our search down to 17 results.

Now the list is fairly manageable. But what if we want it to be very accurate?

Bash
 pacman -Ql systemd | grep -v -E 'zsh|bash|man|polkit|locale|mount|socket' | grep kernel
systemd /etc/kernel/
systemd /etc/kernel/install.d/
systemd /usr/bin/kernel-install
systemd /usr/lib/kernel/
systemd /usr/lib/kernel/install.conf
systemd /usr/lib/kernel/install.d/
systemd /usr/lib/kernel/install.d/50-depmod.install
systemd /usr/lib/kernel/install.d/90-loaderentry.install
systemd /usr/lib/kernel/install.d/90-uki-copy.install

 pacman -Ql systemd | grep -v -E 'zsh|bash|man|polkit|locale|mount|socket' | grep kernel | wc -l
9

At this point, I’d go back to considering what not to include – in this case I know we don’t want any mount or socket files.

Are you noticing a pattern in these results, though? They include the files we’re looking for, related to kernel-install infrastructure, but also the folders. We know which folders they’re in through getting results for the files, so the folder locations are redundant:

Bash
 pacman -Ql systemd | grep -v -E 'zsh|bash|man|polkit|locale|mount|socket|/$' | grep kernel
systemd /usr/bin/kernel-install
systemd /usr/lib/kernel/install.conf
systemd /usr/lib/kernel/install.d/50-depmod.install
systemd /usr/lib/kernel/install.d/90-loaderentry.install
systemd /usr/lib/kernel/install.d/90-uki-copy.install

 pacman -Ql systemd | grep -v -E 'zsh|bash|man|polkit|locale|mount|socket|/$' | grep kernel | wc -l
5

This handy filter, grep -v '/$' should remove all the lines that end with a forward slash: / — and look, it ends up being only 5 related files: kernel-install, the binary, and the included .install scripts.

Since kernel is a fairly unique word, not often used in more than one context, it’s one of the easier ones to narrow down. We could have started by looking for the word kernel first:

Bash
 pacman -Ql systemd | grep 'kernel' | grep -v -E '/$'
systemd /usr/bin/kernel-install
systemd /usr/lib/kernel/install.conf
systemd /usr/lib/kernel/install.d/50-depmod.install
systemd /usr/lib/kernel/install.d/90-loaderentry.install
systemd /usr/lib/kernel/install.d/90-uki-copy.install
systemd /usr/lib/systemd/system/sockets.target.wants/systemd-udevd-kernel.socket
systemd /usr/lib/systemd/system/sys-kernel-config.mount
systemd /usr/lib/systemd/system/sys-kernel-debug.mount
systemd /usr/lib/systemd/system/sys-kernel-tracing.mount
systemd /usr/lib/systemd/system/sysinit.target.wants/sys-kernel-config.mount
systemd /usr/lib/systemd/system/sysinit.target.wants/sys-kernel-debug.mount
systemd /usr/lib/systemd/system/sysinit.target.wants/sys-kernel-tracing.mount
systemd /usr/lib/systemd/system/systemd-udevd-kernel.socket
systemd /usr/share/bash-completion/completions/kernel-install
systemd /usr/share/man/man7/kernel-command-line.7.gz
systemd /usr/share/man/man8/kernel-install.8.gz
systemd /usr/share/man/man8/systemd-udevd-kernel.socket.8.gz
systemd /usr/share/zsh/site-functions/_kernel-install

 pacman -Ql systemd | grep 'kernel' | grep -v -E '/$'  | wc -l
18

Since we put grep kernel first, and did what was most obvious (filter out all the bare folder results), this search becomes admittedly less complicated. However, I thought it might be helpful to demonstrate a more narrow, selective reduction with search filters, since there are likely to be situations where one is looking for something more difficult to narrow down, and eliminating results might make more sense than immediately looking for keywords related to it.

E.g. all executable binaries and libexec files in the libvirt package:

Bash
 pacman -Ql libvirt | grep -v -E 'zsh|bash|man|polkit|locale|mount|socket|/$|\.'
libvirt /usr/bin/libvirtd
libvirt /usr/bin/virsh
libvirt /usr/bin/virt-admin
libvirt /usr/bin/virt-host-validate
libvirt /usr/bin/virt-login-shell
libvirt /usr/bin/virt-pki-query-dn
libvirt /usr/bin/virt-pki-validate
libvirt /usr/bin/virt-qemu-qmp-proxy
libvirt /usr/bin/virt-qemu-run
libvirt /usr/bin/virt-qemu-sev-validate
libvirt /usr/bin/virt-ssh-helper
libvirt /usr/bin/virt-xml-validate
libvirt /usr/bin/virtchd
libvirt /usr/bin/virtinterfaced
libvirt /usr/bin/virtlockd
libvirt /usr/bin/virtlogd
libvirt /usr/bin/virtlxcd
libvirt /usr/bin/virtnetworkd
libvirt /usr/bin/virtnodedevd
libvirt /usr/bin/virtnwfilterd
libvirt /usr/bin/virtproxyd
libvirt /usr/bin/virtqemud
libvirt /usr/bin/virtsecretd
libvirt /usr/bin/virtstoraged
libvirt /usr/bin/virtvboxd
libvirt /usr/lib/libvirt/libvirt_iohelper
libvirt /usr/lib/libvirt/libvirt_leaseshelper
libvirt /usr/lib/libvirt/libvirt_lxc
libvirt /usr/lib/libvirt/libvirt_parthelper
libvirt /usr/lib/libvirt/virt-login-shell-helper
libvirt /usr/share/doc/libvirt/examples/sh/virt-lxc-convert

 pacman -Ql libvirt | grep -v -E 'zsh|bash|man|polkit|locale|mount|socket|/$|\.' | wc -l
31

This is a fairly good example, because how do you search for executables? Well, they don’t usually include a file extension, so that’s exactly what we filtered out with \. at the end (the dot needs to be escaped).

And, indeed, these are essentially all executable files, even the last one in /usr/share/doc (In the case of kernel-install, the .install files are executables, so it’s an awkward juxtaposition, but that’s not very common… I’m sure you get the idea…) A couple quick, last ones, along the same vein:

Bash
 pacman -Ql libvirt | grep '\.sh'
libvirt /usr/lib/libvirt/libvirt-guests.sh

What shell scripts are included in a package? That’s a good one, and from our first example:

Bash
 pacman -Ql dracut sbctl systemd systemd-ukify | grep -i -E '\.install|\.sh' | grep -ivE 'modules.d|x11' | sort -n
dracut /usr/lib/dracut/dracut-functions.sh
dracut /usr/lib/dracut/dracut-init.sh
dracut /usr/lib/dracut/dracut-logger.sh
dracut /usr/lib/dracut/dracut-version.sh
dracut /usr/lib/kernel/install.d/50-dracut.install
dracut /usr/lib/kernel/install.d/51-dracut-rescue.install
sbctl /usr/lib/kernel/install.d/91-sbctl.install
systemd-ukify /usr/lib/kernel/install.d/60-ukify.install
systemd /usr/lib/kernel/install.d/50-depmod.install
systemd /usr/lib/kernel/install.d/90-loaderentry.install
systemd /usr/lib/kernel/install.d/90-uki-copy.install

What .install or .sh scripts are included in dracut, sbctl, systemd and systemd-ukify – sorted in numeric order (which reflects the order of execution in most freedesktop.org software). There’s a little “flag-stacking” in that grep -ivE command, too.

Anyway, I hope this demo helps people. Feel free to leave comments or suggestions, especially if there’s anything you think I missed or left out. Thanks!

Outputting a list of variables to `json` or `yaml` using `column` and `goyq`

Quick little command line kung fu job with this parser called column

Bash
 column -h

Usage:
 column [options] [<file>...]

Columnate lists.

Options:
 -t, --table                      create a table
 -n, --table-name <name>          table name for JSON output
 -O, --table-order <columns>      specify order of output columns
 -C, --table-column <properties>  define column
 -N, --table-columns <names>      comma separated columns names
 -l, --table-columns-limit <num>  maximal number of input columns
 -E, --table-noextreme <columns>  don't count long text from the columns to column width
 -d, --table-noheadings           don't print header
 -m, --table-maxout               fill all available space
 -e, --table-header-repeat        repeat header for each page
 -H, --table-hide <columns>       don't print the columns
 -R, --table-right <columns>      right align text in these columns
 -T, --table-truncate <columns>   truncate text in the columns when necessary
 -W, --table-wrap <columns>       wrap text in the columns when necessary
 -L, --keep-empty-lines           don't ignore empty lines
 -J, --json                       use JSON output format for table

 -r, --tree <column>              column to use tree-like output for the table
 -i, --tree-id <column>           line ID to specify child-parent relation
 -p, --tree-parent <column>       parent to specify child-parent relation

 -c, --output-width <width>       width of output in number of characters
 -o, --output-separator <string>  columns separator for table output (default is two spaces)
 -s, --separator <string>         possible table delimiters
 -x, --fillrows                   fill rows before columns

 -h, --help                       display this help
 -V, --version                    display version

For more details see column(1).

It’s in the util-linux package, which, if I am remembering correctly, is included by default in basically any release outside of netboot and cloud images

Bash
 pacman -Qi util-linux
Name            : util-linux
Version         : 2.40.1-1
Description     : Miscellaneous system utilities for Linux
Architecture    : x86_64
URL             : https://github.com/util-linux/util-linux
Licenses        : BSD-2-Clause  BSD-3-Clause  BSD-4-Clause-UC  GPL-2.0-only
                  GPL-2.0-or-later  GPL-3.0-or-later  ISC  LGPL-2.1-or-later
                  LicenseRef-PublicDomain
Groups          : None
Provides        : rfkill  hardlink
Depends On      : util-linux-libs=2.40.1  coreutils  file  libmagic.so=1-64
                  glibc  libcap-ng  libxcrypt  libcrypt.so=2-64  ncurses
                  libncursesw.so=6-64  pam  readline  shadow  systemd-libs
                  libsystemd.so=0-64  libudev.so=1-64  zlib
Optional Deps   : words: default dictionary for look
Required By     : apr  arch-install-scripts  base  devtools  dracut  f2fs-tools
                  fakeroot  inxi  jfsutils  keycloak  libewf  nilfs-utils
                  ntfsprogs-ntfs3  nvme-cli  ostree  quickemu  reiserfsprogs
                  sbctl  systemd  zeromq
Optional For    : e2fsprogs  gzip  syslinux
Conflicts With  : rfkill  hardlink
Replaces        : rfkill  hardlink
Installed Size  : 14.47 MiB
Packager        : Christian Hesse <eworm@archlinux.org>
Build Date      : Mon 06 May 2024 12:22:23 PM PDT
Install Date    : Wed 08 May 2024 09:27:41 AM PDT
Install Reason  : Installed as a dependency for another package
Install Script  : No
Validated By    : Signature

this demonstrates why it’s included: It’s required by basically all of the setup infrastructure packages (makes sense). But I don’t really see column getting a lot of attention. Not sure why.

Here I used it to convert a list of installed flatpak containers to both JSON and YAML, using the column names from the flatpak’s output options (see flatpak list --help for available columns).

Start by making a list using the flatpak list --columns=$COLUMNS command:

Bash
# export comma-separated column headers, in desired order
export COLUMNS='name,application,version,branch,arch,origin,installation,ref'

# make a list of flatpaks with these columns
flatpak list --app --columns=$NAMES > all-flatpak-apps.list

# verify the list was created
cat all-flatpak-apps.list

# output (truncated):
Delta Chat	chat.delta.desktop	v1.44.1	stable	x86_64	flathub	user	chat.delta.desktop/x86_64/stable
Twilio Authy	com.authy.Authy	2.5.0	stable	x86_64	flathub	user	com.authy.Authy/x86_64/stable
Discord	com.discordapp.Discord	0.0.54	stable	x86_64	flathub	user	com.discordapp.Discord/x86_64/stable
GitButler	com.gitbutler.gitbutler	0.11.7	stable	x86_64	flathub	user	com.gitbutler.gitbutler/x86_64/stable
Drawing	com.github.maoschanz.drawing	1.0.2	stable	x86_64	flathub	user	com.github.maoschanz.drawing/x86_64/stable
Flatseal	com.github.tchx84.Flatseal	2.2.0	stable	x86_64	flathub	user	com.github.tchx84.Flatseal/x86_64/stable
Extension Manager	com.mattjakeman.ExtensionManager	0.5.1	stable	x86_64	flathub	user	com.mattjakeman.ExtensionManager/x86_64/stable
Yubico Authenticator	com.yubico.yubioath	7.0.0	stable	x86_64	flathub	user	com.yubico.yubioath/x86_64/stable
. . . 

It’s kinda hard to read like that, but I suppose if your font were small enough, or the terminal wide enough, the lines would stop wrapping and they’d be easier to read…

Then, take the list and convert it to json with a little column parsing:

Bash
# the flags are: 
# 1. create a table (-t), 
# 2. give it these headers (-N $comma,separated,headervals) 
# 3. limit it to the number we gave you (-l $integer)
# 4. make it json! (-J)
# 5. $INPUT_FILE > [$OUTPUT_FILE] 
column -t -d -N $NAMES -l 8 -J all-flatpak-apps.list > flatpak-apps.json

# column is a lot more forgiving of formatting than jq and yq

I haven’t had a lot of luck piping to column directly to make a parse-inception one-liner, which is why I am making two files (the flatpak.list and the .json file). I am sure there’s some people out there who could make this work, but I want to keep it on the less complicated side for demonstrative purposes, as well.

The output will be json format with the column parse by itself, but some of us like to pretty-print our json with jq , since the colors make it easier to read – especially when they’re not even pretty-printed:

Bash
column -t -d -N $NAMES -l 8 -J all-flatpak-apps.list | jq  

{
  "table": [
    {
      "name": "Delta",
      "application": "Chat",
      "version": "chat.delta.desktop",
      "branch": "v1.44.1",
      "arch": "stable",
      "origin": "x86_64",
      "installation": "flathub",
      "ref": "user\tchat.delta.desktop/x86_64/stable"
    },
    {
      "name": "Twilio",
      "application": "Authy",
      "version": "com.authy.Authy",
      "branch": "2.5.0",
      "arch": "stable",
      "origin": "x86_64",
      "installation": "flathub",
      "ref": "user\tcom.authy.Authy/x86_64/stable"
    },

    {
      "name": "UPnP",
      "application": "Router",
      "version": "Control",
      "branch": "org.upnproutercontrol.UPnPRouterControl",
      "arch": "0.3.4",
      "origin": "stable",
      "installation": "x86_64",
      "ref": "flathub\tuser\torg.upnproutercontrol.UPnPRouterControl/x86_64/stable"
    },
    {
      "name": "Wireshark",
      "application": "org.wireshark.Wireshark",
      "version": "4.2.5",
      "branch": "stable",
      "arch": "x86_64",
      "origin": "flathub",
      "installation": "user",
      "ref": "org.wireshark.Wireshark/x86_64/stable"
    },
    {
      "name": "ZAP",
      "application": "org.zaproxy.ZAP",
      "version": "2.15.0",
      "branch": "stable",
      "arch": "x86_64",
      "origin": "flathub",
      "installation": "user",
      "ref": "org.zaproxy.ZAP/x86_64/stable"
    }
  ]
}

And if you need yaml, the same thing works with yq:

Bash
# what NOT to do (if you want to be able to read it):

column -t -d -N $NAMES -l 8 -J all-flatpak-apps.list | yq
{"table": [{"name": "Delta", "application": "Chat", "version": "chat.delta.desktop", "branch": "v1.44.1", "arch": "stable", "origin": "x86_64", "installation": "flathub", "ref": "user\tchat.delta.desktop/x86_64/stable"}, {"name": "Twilio", "application": "Authy", . . . 

# sometimes yq requires being super-explicit:

# yq flags are: 
# 1. input file type (-p type)
# 2. output file type (-o type)
# 3. pretty-print (-P) 
column -t -d -N $NAMES -l 8 -J all-flatpak-apps.list | yq -p json -o yaml -P
table:
  - name: Delta
    application: Chat
    version: chat.delta.desktop
    branch: v1.44.1
    arch: stable
    origin: x86_64
    installation: flathub
    ref: "user\tchat.delta.desktop/x86_64/stable"
  - name: Twilio
    application: Authy
    version: com.authy.Authy
    branch: 2.5.0
    arch: stable
    origin: x86_64
    installation: flathub
    ref: "user\tcom.authy.Authy/x86_64/stable"
  - name: Discord
    application: com.discordapp.Discord
    version: 0.0.54
    branch: stable
    arch: x86_64
    origin: flathub
    installation: user
    ref: com.discordapp.Discord/x86_64/stable
. . . 

I’ve got the go-yq package, which has a much newer version of jq included with it, so if you’re seeing some differences in behavior or command-line arguments, that could be why – give it a shot if you’re having issues. (I do prefer the original jq, but I don’t really have a choice since it’s a dependency of devtools

Bash
# not a huge fan of gojq-bin, but go-yq is awesome...
 pacman -Qi go-yq
Name            : go-yq
Version         : 4.44.1-1
Description     : Portable command-line YAML processor
Architecture    : x86_64
URL             : https://github.com/mikefarah/yq
Licenses        : MIT
Groups          : None
Provides        : None
Depends On      : glibc
Optional Deps   : None
Required By     : None
Optional For    : None
Conflicts With  : yq
Replaces        : None
Installed Size  : 9.58 MiB
Packager        : Daniel M. Capella <polyzen@archlinux.org>
Build Date      : Sat 11 May 2024 08:14:21 PM PDT
Install Date    : Sat 11 May 2024 09:08:38 PM PDT
Install Reason  : Explicitly installed
Install Script  : No
Validated By    : Signature

And don’t forget, column should be able to format basically any time of list with repeating columns. I guess that’s all for now, enjoy!

ok nevermind, just one more thing: This has nothing to do with column, necessarily, but it’s all the output you can get when you choose json as your output. I’ll have to do another post about this, but it’s tangentially related.

Look at the output from kubernetes kubectl get pods -A :

Bash
kubectl get pods -A
NAMESPACE              NAME                                        READY   STATUS    RESTARTS       AGE
default                elasticsearch-coordinating-0                1/1     Running   0              91m
default                elasticsearch-coordinating-1                1/1     Running   0              91m
default                elasticsearch-data-0                        1/1     Running   0              91m
default                elasticsearch-data-1                        1/1     Running   0              91m
default                elasticsearch-ingest-0                      1/1     Running   0              91m
default                elasticsearch-ingest-1                      1/1     Running   0              91m
default                elasticsearch-master-0                      1/1     Running   0              91m
default                elasticsearch-master-1                      1/1     Running   0              91m
kube-system            coredns-7db6d8ff4d-x8nnb                    1/1     Running   1 (101m ago)   125m
kube-system            etcd-minikube                               1/1     Running   1 (101m ago)   125m
kube-system            kube-apiserver-minikube                     1/1     Running   1 (101m ago)   125m
kube-system            kube-controller-manager-minikube            1/1     Running   1 (101m ago)   125m
kube-system            kube-proxy-jbds4                            1/1     Running   1 (101m ago)   125m
kube-system            kube-scheduler-minikube                     1/1     Running   1 (101m ago)   125m
kube-system            metrics-server-c59844bb4-d8wnd              1/1     Running   1 (101m ago)   119m
kube-system            storage-provisioner                         1/1     Running   3 (101m ago)   125m
kubernetes-dashboard   dashboard-metrics-scraper-b5fc48f67-j5znq   1/1     Running   1 (101m ago)   121m
kubernetes-dashboard   kubernetes-dashboard-779776cb65-rh8s2       1/1     Running   2 (101m ago)   121m
portainer              portainer-7bf545c674-xnjjr                  1/1     Running   1 (101m ago)   119m
yakd-dashboard         yakd-dashboard-5ddbf7d777-mzqk2             1/1     Running   1 (101m ago)   119m

It’s not bad, but check out all the info you get when you add --output json:

Bash
# +`jq` to colorize the output (or `yq -p json -o json -P`)
kubectl get pods -A -o json | jq 
{
  "apiVersion": "v1",
  "items": [
    {
      "apiVersion": "v1",
      "kind": "Pod",
      "metadata": {
        "creationTimestamp": "2024-05-25T12:26:56Z",
        "generateName": "elasticsearch-coordinating-",
        "labels": {
          "app": "coordinating-only",
          "app.kubernetes.io/component": "coordinating-only",
          "app.kubernetes.io/instance": "elasticsearch",
          "app.kubernetes.io/managed-by": "Helm",
          "app.kubernetes.io/name": "elasticsearch",
          "app.kubernetes.io/version": "8.13.4",
          "apps.kubernetes.io/pod-index": "0",
          "controller-revision-hash": "elasticsearch-coordinating-64759546b",
          "helm.sh/chart": "elasticsearch-21.1.0",
          "statefulset.kubernetes.io/pod-name": "elasticsearch-coordinating-0"
        },
        "name": "elasticsearch-coordinating-0",
        "namespace": "default",
        "ownerReferences": [
          {
            "apiVersion": "apps/v1",
            "blockOwnerDeletion": true,
            "controller": true,
            "kind": "StatefulSet",
            "name": "elasticsearch-coordinating",
            "uid": "e403f4a1-3058-4830-8f4e-25323fa68be5"
          }
        ],
        "resourceVersion": "2737",
        "uid": "5c26ea5d-5ec7-40b1-946c-573651123552"
      },
      "spec": {
        "affinity": {},
        "automountServiceAccountToken": false,
        "containers": [
          {
            "env": [
              {
                "name": "MY_POD_NAME",
                "valueFrom": {
                  "fieldRef": {
                    "apiVersion": "v1",
                    "fieldPath": "metadata.name"
                  }
                }
              },
              {
                "name": "BITNAMI_DEBUG",
                "value": "false"
              },
              {
                "name": "ELASTICSEARCH_CLUSTER_NAME",
                "value": "elastic"
              },
              {
                "name": "ELASTICSEARCH_IS_DEDICATED_NODE",
                "value": "yes"
              },
              {
                "name": "ELASTICSEARCH_NODE_ROLES"
              },
              {
                "name": "ELASTICSEARCH_TRANSPORT_PORT_NUMBER",
                "value": "9300"
              },
              {
                "name": "ELASTICSEARCH_HTTP_PORT_NUMBER",
                "value": "9200"
              },
              {
                "name": "ELASTICSEARCH_CLUSTER_HOSTS",
                "value": "elasticsearch-master-hl.default.svc.cluster.local,elasticsearch-coordinating-hl.default.svc.cluster.local,elasticsearch-data-hl.default.svc.cluster.local,elasticsearch-ingest-hl.default.svc.cluster.local,"
              },
              {
                "name": "ELASTICSEARCH_TOTAL_NODES",
               . . . 

It’s nice that kubectl actually has a yaml output, since it’s a little easier to read than json, what with all the [{"punctuation": "on"},{"basically": "every}, {"word": true}], but most programs, if they even offer json, probably aren’t going to offer yaml – so to convert it, here’s the pipe string:

Bash
# adding `yq` colorizes output to `yaml` output, too
kubectl get pods -A -o json | yq -p json -o yaml -P  
apiVersion: v1
items:
  - apiVersion: v1
    kind: Pod
    metadata:
      creationTimestamp: "2024-05-25T12:26:56Z"
      generateName: elasticsearch-coordinating-
      labels:
        app: coordinating-only
        app.kubernetes.io/component: coordinating-only
        app.kubernetes.io/instance: elasticsearch
        app.kubernetes.io/managed-by: Helm
        app.kubernetes.io/name: elasticsearch
        app.kubernetes.io/version: 8.13.4
        apps.kubernetes.io/pod-index: "0"
        controller-revision-hash: elasticsearch-coordinating-64759546b
        helm.sh/chart: elasticsearch-21.1.0
        statefulset.kubernetes.io/pod-name: elasticsearch-coordinating-0
      name: elasticsearch-coordinating-0
      namespace: default
      ownerReferences:
        - apiVersion: apps/v1
          blockOwnerDeletion: true
          controller: true
          kind: StatefulSet
          name: elasticsearch-coordinating
          uid: e403f4a1-3058-4830-8f4e-25323fa68be5
      resourceVersion: "2737"
      uid: 5c26ea5d-5ec7-40b1-946c-573651123552
    spec:
      affinity: {}
      automountServiceAccountToken: false
      containers:
        - env:
            - name: MY_POD_NAME
              valueFrom:
                fieldRef:
                  apiVersion: v1
                  fieldPath: metadata.name
            - name: BITNAMI_DEBUG
              value: "false"
            - name: ELASTICSEARCH_CLUSTER_NAME
              value: elastic
            - name: ELASTICSEARCH_IS_DEDICATED_NODE
              value: "yes"
            - name: ELASTICSEARCH_NODE_ROLES
            - name: ELASTICSEARCH_TRANSPORT_PORT_NUMBER
              value: "9300"
            - name: ELASTICSEARCH_HTTP_PORT_NUMBER
              value: "9200"
            - name: ELASTICSEARCH_CLUSTER_HOSTS
              value: elasticsearch-master-hl.default.svc.cluster.local,elasticsearch-coordinating-hl.default.svc.cluster.local,elasticsearch-data-hl.default.svc.cluster.local,elasticsearch-ingest-hl.default.svc.cluster.local,
            - name: ELASTICSEARCH_TOTAL_NODES
              value: "4"
            - name: ELASTICSEARCH_CLUSTER_MASTER_HOSTS
              value: elasticsearch-master-0 elasticsearch-master-1
            - name: ELASTICSEARCH_MINIMUM_MASTER_NODES
              value: "2"
            - name: ELASTICSEARCH_ADVERTISED_HOSTNAME
              value: $(MY_POD_NAME).elasticsearch-coordinating-hl.default.svc.cluster.local
            - name: ELASTICSEARCH_HEAP_SIZE
              value: 128m
          image: docker.io/bitnami/elasticsearch:8.13.4-debian-12-r0
          imagePullPolicy: IfNotPresent
          livenessProbe:
            failureThreshold: 5
            initialDelaySeconds: 180
            periodSeconds: 10
            successThreshold: 1
            tcpSocket:
              port: rest-api
            timeoutSeconds: 5
          name: elasticsearch
          ports:
            - containerPort: 9200
              name: rest-api
              protocol: TCP
            - containerPort: 9300
              name: transport
              protocol: TCP
          readinessProbe:
            exec:
              command:
                - /opt/bitnami/scripts/elasticsearch/healthcheck.sh
            failureThreshold: 5
            initialDelaySeconds: 90
            periodSeconds: 10
            successThreshold: 1
            timeoutSeconds: 5
          resources:
            limits:
              cpu: 750m
              ephemeral-storage: 1Gi
              memory: 768Mi
            requests:
              cpu: 500m
              ephemeral-storage: 50Mi
              memory: 512Mi
          securityContext:
            allowPrivilegeEscalation: false
            capabilities:
              drop:
                - ALL
            privileged: false
            readOnlyRootFilesystem: true
            runAsGroup: 1001
            runAsNonRoot: true
            runAsUser: 1001
            seLinuxOptions: {}
            seccompProfile:
              type: RuntimeDefault
          terminationMessagePath: /dev/termination-log
          terminationMessagePolicy: File
          volumeMounts:
            - mountPath: /tmp
              name: empty-dir
              subPath: tmp-dir
            - mountPath: /opt/bitnami/elasticsearch/config
              name: empty-dir
              subPath: app-conf-dir
              . . . 

It sure is nice to be able to read the stuff that comes out of the tools we’re using every day…